
You can make bright, durable glow-in-the-dark epoxy by mixing clear casting or table-top resin with non-encapsulated glow powder, using a 2:1 resin to hardener ratio and then adding about 30% glow powder while working within 20 minutes. Use transparent resin dyes for stronger charge, stir frequently to prevent settling (larger particles settle faster), degas or torch bubbles, and pour into molds or onto your surfaces for sanding, buffing, or coating once fully cured for optimal glow and finish.
Understanding Resin Epoxy
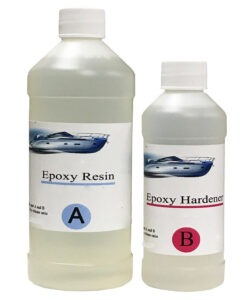
What is Resin Epoxy?
You work with a two-part system—resin and hardener—that chemically cures to a hard, durable plastic; typical mixing ratios you’ll encounter are 2:1 (resin:hardener) and working times around 20 minutes for fast blends, while clear casting or tabletop resins often take about 24 hours to fully cure. You use it as a protective, glossy barrier or to cast objects, and its transparency directly affects how brightly your glow powder charges and radiates in the dark.
Types of Resin Epoxy
You’ll most commonly choose between tabletop resins for protective coatings, clear casting resins for transparent pours, fast or quick-cast resins for rapid jobs that cure in ~10 minutes, UV resins for small pieces cured with a lamp, and thin epoxy adhesives for structural joins; each type varies in cure time, clarity, viscosity, and suitability for mixing large amounts of glow powder.
| Tabletop Resin | Clear, heat/water resistant, ideal for coatings; comparable to 50+ polyurethane layers. |
| Clear Casting Resin | Transparent pours for deep casts; cures in ~24 hours, best for bright glow mixes. |
| Fast/Quick Cast | Hardens within 10 minutes, cures white, useful for rapid prototypes but dimmer glow. |
| UV Resin | Cures in minutes under a UV lamp, limited depth per cure, great for small decorative pieces. |
| Epoxy Adhesive | High-strength, low-volume joins, longer cure times and not ideal for deep casting. |
When you pick a resin, match project depth and clarity to pigment behavior: transparent casting maximizes glow because UV charges the powder through resin, whereas opaque or white-curing systems reduce brightness; particle size matters too—>15 micron pigments settle and are useful for filling wood grain, while <15 micron stays suspended for uniform casts—mix ratios like 2:1 and up to ~30% pigment by mass affect viscosity and working time, so always test a small batch.
- Choose clear casting resin when you want maximum glow and deep pours.
- Use tabletop resin for protective surfaces and edge-to-edge coatings.
- Pick fast-cure resin only for small pieces or time-sensitive jobs.
- For tiny decorations, UV resin gives instant cures but has depth limits.
- Any resin you select, run a 100 g test batch to confirm cure, color, and glow intensity before committing to large pours.
- Stir gently but thoroughly to prevent air bubbles and avoid pigment clumping.
- Account for settling: larger micron powders will migrate downward after ~10 minutes.
- Adjust pour thickness—deeper casts may need casting-specific resins with longer cure times.
- Monitor ambient temperature; resin viscosity and cure speed change significantly between 18–28°C (64–82°F).
- Any batch mixed with >30% pigment will shorten working time and may require faster pours or smaller volumes.
Advantages of Using Resin Epoxy
You gain a durable, glossy finish that resists water and heat, a material that bonds to wood, metal, and plastic, and a transparent medium that lets glow powder charge and emit light effectively; typical tabletop epoxies mimic 50+ layers of polyurethane and can be sanded or planed after cure, allowing you to refine edges and surfaces for a professional look.
Beyond aesthetics, you rely on epoxy’s chemical resistance and mechanical strength for long-lasting projects—kitchen-grade table tops and bar pours routinely last years with minimal yellowing when you choose UV-stable formulations; moreover, the ability to suspend pigments or let larger particles settle into grooves gives you creative control over glow placement and surface finish, enabling both uniform luminescence and inlaid, high-contrast effects.
Glow in the Dark Powder
What is Glow in the Dark Powder?
You work with finely milled photoluminescent pigments—typically strontium aluminate or older zinc sulfide formulations—that absorb light and re-emit it in the dark; strontium aluminate is the modern choice for brighter, longer afterglow, while zinc sulfide is dimmer and shorter-lived. You’ll find powders in natural white/off-white and daytime-tinted variants that act like a resin dye, and non-encapsulated powder generally gives a stronger glow once the resin cures.
Types of Glow Powder
You’ll choose between strontium aluminate (long-lasting, bright), zinc sulfide (budget, shorter glow), daytime-colored pigments (fluorescent tints for visible color in daylight), encapsulated vs non-encapsulated (non-encapsulated glows brighter), and various micron sizes—particles >15 µm tend to settle, while <15 µm stay suspended in epoxy for smoother finishes.
- Strontium aluminate: high brightness, 6–12+ hours of faint afterglow under ideal charge.
- Zinc sulfide: lower cost, useful for small projects with short glow needs.
- Daytime colors: dye tint gives visible color under light and colored glow in dark.
- Particle size: >15 µm settles (good for filling grooves); <15 µm stays suspended.
- This helps you match powder choice to application (tabletop, castings, inlays).

| Strontium Aluminate | Brightest, longest afterglow (hours), ideal for durable epoxy projects |
| Zinc Sulfide | Lower brightness, shorter duration, budget-friendly for novelty items |
| Daytime-Tinted Powders | Opaque in light, colored glow; behaves like a resin dye when mixed |
| Encapsulated vs Non-Encapsulated | Non-encapsulated = brighter glow once resin bonds; encapsulated easier to handle |
| Micron Sizes | <15 µm = suspended finish; >15 µm = settles into grooves for inlays |
When you need deeper guidance: pick strontium aluminate for lasting installations and larger particles (20–40 µm) when you want the pigment to settle into wood grain or engraved signs; choose <15 µm for smooth, even tabletop pours. You can add up to ~30% powder by weight for strong glow but expect faster working time and potential viscosity changes, so test small batches first.
- Large-particle use: inlays, gap-filling, wood work where settling is useful.
- Fine-particle use: bar tops, clear pours, and pieces needing uniform clarity.
- Mixing tip: start with 10–30% by weight and adjust for brightness and flow.
- Charging method: UV-A (≈365 nm) charges fastest; sunlight works but varies.
- This lets you optimize particle size, loading, and charging for your project.
| Application | Recommended particle size and loading |
| Tabletops / Clear pours | <15 µm; 10–20% loading for even suspension |
| Inlays / Wood fills | 20–40 µm; 20–30% loading so pigment settles into grooves |
| Cast objects | Depends on clarity: fine for transparent casts, coarse for textured pieces |
| Color effects | Daytime pigments or transparent dyes combined for varied daytime hue |
| Charge source | UV lamp for fastest charge; sunlight for convenience |
How Glow Powder Works
You rely on photoluminescence: photons lift electrons into higher energy states, and when they return to ground state they emit visible light; strontium aluminate stores more energy and can glow for hours, while zinc sulfide emits for minutes to an hour. You’ll get the best initial brightness by charging with a UV-A lamp (≈365 nm) for several minutes before testing in darkness.
The mechanism depends on dopants (e.g., europium, dysprosium in strontium aluminate) that create trapping sites—europium provides strong emission, dysprosium extends afterglow—so you can expect an intense peak within the first 10–30 minutes and a long tail that fades over hours; particle size affects light absorption and scattering, and adding opaque dyes will reduce charge penetration and overall glow, so balance dye choice with desired nighttime brightness.
Choosing the Right Products
Selecting the Best Resin for Your Project
You should match resin type to function: use clear casting resin for transparent pours and maximum glow (full cure ~24 hours), table-top epoxy for protective, heat- and water-resistant coatings (equivalent to ~50 layers of polyurethane), and fast-cast for quick prototypes (sets ≈10 minutes but cures white). Mix epoxy:hardener 2:1 and work within the typical 20-minute pot life to avoid premature gelation when adding glow powder.
Types of Glow Powder to Consider
You’ll choose between natural (white/off-white), daytime-colored (fluorescent-tinted), and encapsulated vs non-encapsulated powders; non-encapsulated glows brighter, larger microns (>15 μm) store more light and glow longer but tend to settle, while finer powders (<15 μm) stay suspended for more even casts. Typical colors include Green, Aqua and Blue; add about 30% powder by weight for strong glow.
- Natural: bright nocturnal output, appears off-white in daylight.
- Daytime-colored: adds visible daytime tint, behaves like a resin dye.
- Assume that larger particle sizes (>15 μm) will settle into grooves but provide longer, stronger glow.
| Particle Size | Effect on Glow & Stability |
| <15 μm | Stays suspended; smoother appearance; shorter glow duration |
| >15 μm | Settles into textures; longer, brighter glow; ideal for fills |
| Encapsulated | More durable but slightly dimmer glow |
| Non-encapsulated | Brighter glow; becomes waterproof once resin cures |
You can optimize outcomes by balancing micron size with project type: for table tops you may prefer finer powders for even coverage, while river tables and carved woods benefit from coarser pigments that settle into veins and hold charge longer. Use transparent resin dyes to avoid blocking UV charge; if you need fast setting consider fast-cast but expect reduced brightness versus clear casting resins. Mix 30% powder by volume for strong luminescence and stir continuously for the first 10 minutes to limit premature settling.
- Green/Aqua/Blue variants available; choose based on ambient glow preference.
- Use non-encapsulated powders when max brightness is the priority.
- Assume that pigment settling begins around 10 minutes after mixing, so keep stirring during pours.
| Color Variant | Typical Day/Night Behavior |
| Green | Highly visible glow; strong day-to-night contrast |
| Aqua | Softer daytime hue; cool-toned glow |
| Blue | Deeper night glow; may appear paler in daylight |
| Daytime-Tinted | Shows color in light and glows accordingly in dark |
Additional Additives and Enhancements
You can add transparent resin dyes (use sparingly, 1–3 drops per 100 g resin), mica for shimmer (1–3% by weight), flow improvers to reduce surface tension, or defoamers to minimize bubbles; UV stabilizers and anti-yellowing additives (0.5–1%) extend clarity. Test small batches: additives alter cure time and viscosity, so you’ll adjust pot life and mixing technique accordingly.
For stronger, longer-lasting results pair non-encapsulated glow powder with transparent dye only when you need daytime tint—opaque dyes block UV and cut glow significantly. When embedding objects or creating layers, use thickeners to suspend larger pigments and degas with vacuum or pressure pots to remove bubbles that scatter light. If you plan frequent outdoor exposure, include UV stabilizers at ~0.5–1% to slow discoloration; always run a 100 g test mix to verify color, cure, and glow before full pours.
Preparation
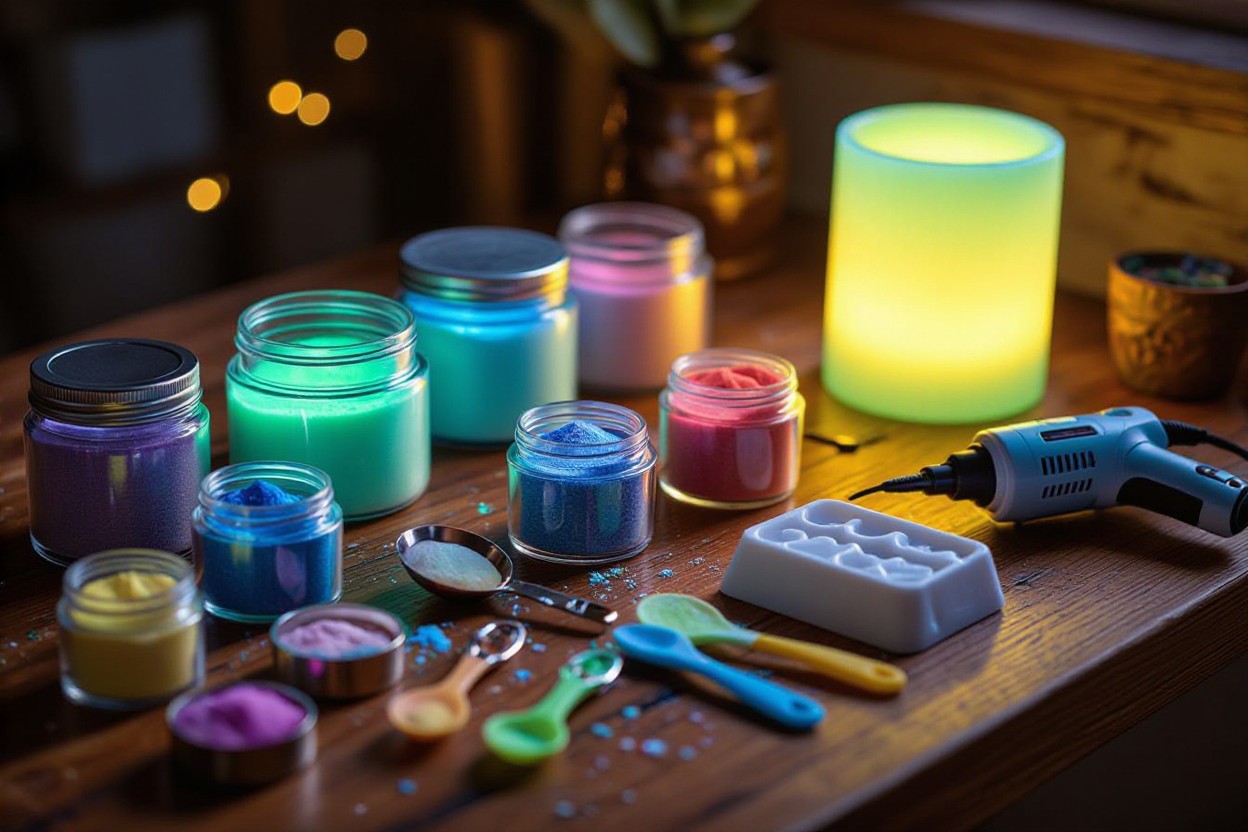
Gathering Necessary Supplies
You’ll need a two-part clear casting or table-top resin, Techno Glow non-encapsulated powder, a digital scale and graduated mixing cups, mixing sticks, nitrile gloves, chemical splash goggles, a NIOSH-rated respirator (organic vapor + particulate), silicone molds or sealed work surface, a heat gun or small torch for bubbles, a bubble level and thermometer, transparent resin dye if desired, and disposal bags. Plan for a 2:1 resin:hardener mix and roughly 30% glow powder by volume for bright results.
Setting Up Your Work Area
Set up on a flat, level bench in a well-ventilated room kept around 70–75°F with low humidity, cover surfaces with disposable silicone or plastic sheeting, and arrange tools within arm’s reach so you can mix and pour within the resin’s ~20-minute working time. Keep a dedicated dust-free curing zone and place a trash bin and cleaning supplies nearby.
Place a box or folding tent over small pours to cut airborne dust, and position an exhaust fan to pull air out of the room while avoiding direct airflow across the pour which can create ripples. Pre-weigh resin and hardener into separate cups to speed mixing, and pre-measure glow powder into small scoops—pigments begin to settle after ~10 minutes so you want everything ready to combine and pour. Use a bubble level for flat projects and an LED daylight lamp to inspect for dust or microbubbles before curing; keep a heat gun on low to pop surface bubbles without overheating the resin.
Safety Precautions
Wear nitrile gloves, chemical splash goggles, and a respirator rated for organic vapors and particulates; maintain good ventilation by exhausting to the outdoors or using a filtered fan. Avoid skin contact with uncured resin, keep kids and pets out of the area, and follow manufacturer SDS instructions for both the resin and glow powder. Dispose of waste per local regulations.
Understand that uncured epoxy is a sensitizer and can cause dermatitis or respiratory irritation—if you get resin on your skin, wipe with a disposable cloth, clean with isopropyl alcohol, then wash with soap and water. Use a respirator such as a half-mask with organic vapor cartridges plus P100 filters (for example, compatible 3M systems) when working beyond short bench sessions. Change nitrile gloves when contaminated (typically every 20–30 minutes for heavy work), store chemicals between 60–85°F away from sunlight, and keep an SDS and spill kit handy for accidental releases.
Mixing Resin
You should mix resin in small batches (2:1 resin to hardener) to match the epoxy’s 20-minute working time, stirring slowly for at least 2–3 minutes to fully wet the hardener and minimize bubbles. Use a clean, calibrated cup or digital scale, scrape sides and bottom, and transfer to a fresh container before adding powders or dyes to cut down on unmixed pockets that cause tacky spots or uneven cure.
Measuring Resin and Hardener
Measure precisely: 2 parts resin to 1 part hardener by volume (or the manufacturer’s ratio by weight), keeping accuracy within 1–2% for a proper cure. Use marked mixing cups or a digital scale, pour each component separately, and level off. If you’re using quick-cure or fast-cast systems, reduce batch size — a 100–200 mL batch matches typical 10–20 minute pot lives and keeps handling easy.
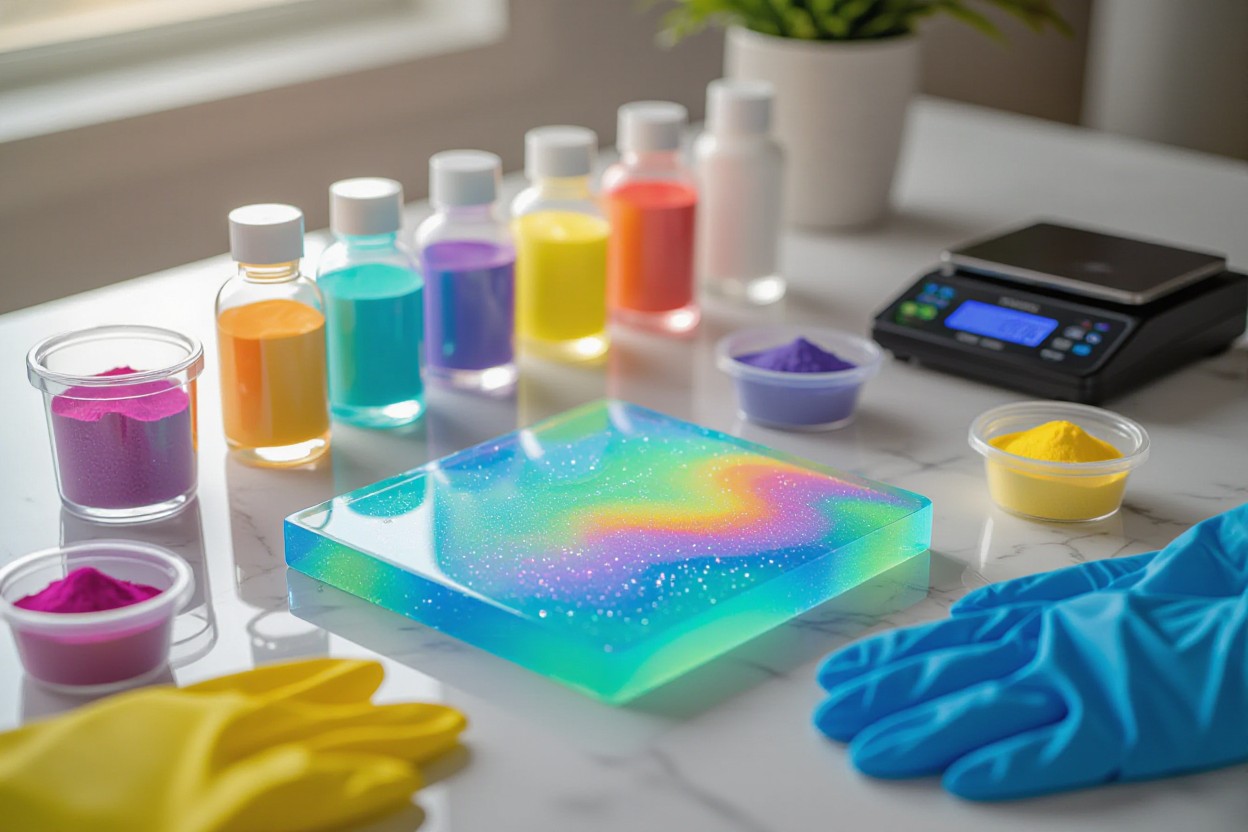
Incorporating Glow in the Dark Powder
Add glow powder after the resin and hardener are fully mixed, using about 30% pigment by volume of the mixed resin for bright results. Stir gently but thoroughly for 30–60 seconds to avoid whipping air; mix in a separate cup if you want a slurry first. Work quickly — pigments begin settling after roughly 10 minutes, and the mixed batch should be used within the epoxy’s stated working time.
Use non-encapsulated PLC powders for stronger glow; larger micron sizes store more light and glow longer but will settle (particles >15 microns sink into grooves, ideal for fill work). To prevent clumps, pre-mix powder with a small amount of resin to form a smooth paste before folding into the bulk mix. Avoid exceeding ~30–40% pigment or you’ll reduce clarity and slow cure; pair with transparent dye if you want daytime tint without blocking UV charge.
Achieving the Right Consistency
Target a pourable, syrup-like viscosity for casting or a slightly thicker, spreadable consistency for fills; adding glow powder will thicken the mix, so anticipate increased viscosity at 30% pigment. Stir slowly to integrate without creating bubbles, and aim for a homogenous mix free of streaks so the glow is even after cure.
If you need lower viscosity, gently warm your containers in a 25–30°C water bath before mixing to improve flow and reduce trapped air—don’t overheat, as heat shortens pot life. For thicker fills, use room-temperature resin and higher pigment loading; balance batch size and working time (small batches for fast cures) to maintain control while avoiding solvent thinners that can compromise cure and glow intensity.
Managing Bubbles
Air bubbles are the most common visual issue when working with glow powders in resin; you should minimize them during mixing and remove them before cure. Mix at the recommended 2:1 resin-to-hardener ratio, stir slowly for 2–3 minutes while scraping the sides, then let the mix sit 5–10 minutes so microbubbles rise. Warm your resin to about 75–85°F to lower viscosity, pour in thin layers (1/8″–1/4″) and use targeted heat or a pressure pot if persistent bubbles remain.
Causes of Bubbles in Resin
You introduce bubbles mainly by mixing too vigorously, using cold high-viscosity resin, or adding powders too fast; for example, stirring at high speed traps tiny air pockets and bulk mixing increases exotherm and microbubbles. Moist or porous substrates like green wood outgas during cure, and pouring from a height splashes in air. Fast-cure resins that gel in 10 minutes give you less time to let bubbles escape, while pigments over 15 microns will settle after ~10 minutes.
Techniques for Reducing Bubbles
Slow, controlled mixing is your first defense: warm resin in a 10–15 minute warm water bath to ~80°F, measure accurately, then stir slowly for 2–3 minutes scraping the sides and bottom. After adding about 30% glow powder, stir gently for 20–30 seconds and let the batch rest 5–10 minutes for bubbles to rise. Pour slowly into shallow layers, use a toothpick to pop surface bubbles, and consider a pressure pot at 40–60 psi or a vacuum chamber if you have one.
For a repeatable workflow: pre-warm your resin and hardener 10–15 minutes, combine at 2:1 and stir slowly for 2–3 minutes; add 30% PLC glow powder and mix gently for 20–30 seconds to avoid reintroducing air. Let the mixture sit 5–10 minutes so bubbles and microbubbles rise, then pour in thin passes using a ladle or spoon positioned close to the surface. If pigments begin settling after ~10 minutes, give a very gentle stir or pour in layers so heavier particles embed where you want them.
Using Heat Tools to Eliminate Bubbles
Heat tools pop surface bubbles by lowering resin viscosity: a butane or culinary torch, heat gun on low, or even a hair dryer on warm will work. Keep torches 4–8 inches away and sweep quickly—2–4 passes—so you don’t scorch or amber the resin. For heat guns, hold 8–12 inches back on low heat and move continuously; do short passes and pause between sweeps to avoid overheating the piece.
Apply heat in controlled bursts: for a small pouring area, use a culinary torch at ~6 inches and sweep at about 1–2 inches per second for 2–3 quick passes, then wait 30–60 seconds and repeat if needed. For larger surfaces, use a heat gun on low at 8–12 inches, moving steadily to avoid localized hot spots. Avoid direct prolonged flame contact—surface gloss improves after 1–3 passes. Always ventilate and use appropriate PPE when using open flame or strong heat near curing resin.
Curing Process
You’ll see curing described as tack, gel, and full cure: clear casting resins often reach a full cure in about 24 hours, table-top epoxies commonly surface cure in 8–12 hours and harden fully in 24–48 hours, while fast-cast systems set in ~10 minutes but cure white. Stick to the 2:1 resin-to-hardener ratio, add up to 30% glow powder, and use the mixed batch within ~20 minutes to avoid premature thickening or uneven cure.
Understanding the Curing Time
Gel time (pot life) governs how long you can work—many mixes give you ~20 minutes before viscosity rises. Thin pours and warmer conditions shorten cure; deep casts increase exotherm and can overheat, yellow, or crack. For multi-layer pieces, allow at least 12–24 hours between coats for table-top resins and 24+ hours for clear casting pieces to reach handling strength.
Environmental Factors Affecting Cure
Temperature, humidity, and airflow directly change cure speed and finish: aim for 70–75°F (21–24°C) and <50% relative humidity for predictable results. Cold slows chemical reactions, causing tacky surfaces; high humidity can cause amine blush on epoxy; wind or drafts can cool the pour unevenly and introduce dust or bubbles.
In practice, raising room temperature by 5–10°F can shave hours off cure time but increases the risk of ambering and bubbles, especially with high pigment loads like 30% glow powder. You should monitor ambient RH with a hygrometer—above ~60% you’ll likely see surface defects—so use a controlled space or small space heater (not direct heat on the pour) to stabilize conditions.
- Temperature control: keep 70–75°F (21–24°C) for predictable cures.
- Humidity control: aim below 50% to avoid amine blush and tack.
- Any drafts or direct sunlight can cool or overheat sections, causing uneven cure and bubbles.
How to Ensure a Successful Cure
Measure the 2:1 resin-to-hardener ratio precisely by volume or weight, mix thoroughly for 2–3 minutes scraping container sides, then add glow powder (up to ~30%) and work within the ~20-minute pot life. Keep pours thin for table-top work (1/8–1/4″ per layer) or follow the casting resin’s max pour depth, and de-gas soon after mixing to reduce bubbles.
For larger casts, pour in stages to control exotherm; for thin coatings, use a heat gun lightly to pop surface bubbles within the first 10 minutes. If you use larger micron glow pigments (>15 µm), expect settling after ~10 minutes and plan your stir/pour sequence to embed pigment into grooves or avoid uneven distribution.
- Accurate ratio: 2 parts resin to 1 part hardener by volume or weight.
- Mix technique: scrape sides, stir 2–3 minutes, and de-gas within 10 minutes.
- Any post-cure warming (where manufacturer allows, e.g., low oven at ~60°C) will improve hardness and clarity for some resins.
Cleanup and Finish
After your last pour, act quickly: mixed epoxy is usable for about 20 minutes and pigments start settling after 10 minutes, so wipe tools and spills while still tacky. You should let large pours cure fully (clear casting resin often takes ~24 hours) before aggressive finishing. Keep nitrile gloves and respirator on during cleanup, isolate waste in disposable cups to cure, and ventilate the workspace to clear fumes and dust from sanding.
Cleaning Tools and Workspace
You should remove uncured resin with 90% isopropyl or denatured alcohol and clean brushes or stir sticks within the 20-minute pot life; cured residue must be sanded off or left to cure in a disposable container. Use paper towels for bulk removal, then wipe surfaces with solvent. Seal and dispose of contaminated rags in metal containers to avoid fire risk. Finally, vacuum and tack-cloth the area to capture fine glow-powder dust before finishing.
Sanding and Polishing Techniques
Begin with coarse grit for leveling—120–240 to remove runs—then progress to 400–600 for smoothing. Wet-sand with 800–1200 grit to eliminate micro-scratches, then polish with a rotary or orbital buffer using a fine polishing compound. You should use an orbital sander for large tabletops and hand-sanding for edges and inlays; wear a dust mask and work in stages to protect embedded glow pigments.
For best results, start by flattening with 120 grit only where excess cured resin exists, then switch to 240–400 to feather edges. Next, wet-sand sequentially using 600, 1000, then 1500–2000 grit—keep the surface lubricated to prevent clogging. Finish by buffing at low speed with a microfiber pad and a polishing compound like a fine automotive polish or white rouge; this restores clarity and maximizes light transmission to the glow pigment.
Final Sealing and Protection
Seal your piece with a UV-resistant table top resin or clear lacquer to protect against abrasion and yellowing; table top resins behave like roughly 50 layers of polyurethane and give durable, water-resistant protection. Apply thin, even coats (follow the resin manufacturer’s recommended thickness), allow full cure—often 24 hours for clear resins—then sand lightly between coats with 400–800 grit for adhesion and clarity.
Mix final topcoats at the 2:1 epoxy-to-hardener ratio, degas if possible, and pour in thin passes to avoid excessive heat. Wait 12–24 hours between coats and sand with 400–600 grit before each subsequent pour to promote bonding. Choose a UV-stable finish when using transparent dyes and non-encapsulated glow powder to keep daytime color vivid and maximize night-time glow longevity.
Troubleshooting Common Issues
What to Do About Cloudiness
If your cast turns cloudy, check for moisture, excess opaque dye, or wrong resin choice—fast cast resins cure white and reduce glow. You can often recover clarity by wet-sanding (400–2000 grit) and polishing with a compound, or by applying a thin clear topcoat of table-top resin after the piece fully cures (24 hours for clear casting resins). Also avoid adding more than the recommended 30% glow powder by volume; pigments >15 microns can settle and create uneven opacity if overused.
Addressing Incomplete Curing
If the epoxy remains tacky or soft, first verify your 2:1 resin-to-hardener mix and ambient temperature—cures slow below ~20°C (68°F). Excessive powder (>30%) or mixing in bulk beyond the 20-minute pot life can inhibit cure. For shallow pours, give clear casting resin up to 24–48 hours at room temperature, or carefully apply gentle heat (40–60°C/104–140°F) for a few hours to accelerate curing if the manufacturer permits.
For stubborn uncured spots, scoop or scrape away the tacky layer, sand to clean edges, then re-degas and apply a fresh, properly mixed thin layer; mixing smaller batches (under your 20-minute working window) reduces exotherm and incomplete cure risk. If you consistently get soft casts, test with a new hardener batch and avoid exceeding 30% glow powder—run a small 1:1 test patch with correct ratios to isolate the problem.
Fixing Excessive Bubbles
To reduce bubbles, warm components to 25–30°C (77–86°F) before mixing, stir slowly to avoid aeration, and pour close to the mold/surface. Use a butane torch or heat gun in quick 2–5 second passes to pop surface bubbles immediately after pouring. If you have access, a vacuum degassing chamber before pouring or a pressure pot at 40–60 psi for 10–15 minutes after pouring will dramatically cut trapped bubbles.
For persistent bubble issues, inspect technique: vigorous stirring and pouring from height introduce air, and pigments settling after ~10 minutes can trap bubbles in pockets—stir gently and pour in thin layers, allowing each to self-level and gas off. For large voids use a toothpick to coax bubbles to the surface before torching, and avoid mixing large batches that exceed the stated pot life and cause excessive exotherm and foaming.
Frequently Asked Questions
How Much Powder and Resin Epoxy Do I Need?
For small projects, mix 66.7 g resin with 33.3 g hardener (2:1 by weight) to make 100 g of mixed epoxy, then stir in about 30 g PLC Glow Powder (roughly 30% of the mixed epoxy) for a bright glow; scale proportionally—e.g., for 500 g mixed epoxy add 150 g powder—and use the batch within your resin’s working time.
Mixing Ratio for Resin Epoxy and Glow in the Dark Powder
Start by mixing your epoxy resin and hardener at 2 parts resin to 1 part hardener, then add roughly 30% PLC Glow Powder to the combined mix; work quickly, since most table-top and clear casting epoxies give you about 20 minutes of workable time before thickening.
Adding 30% powder raises viscosity and can slow full cure, so if you need thinner flow you can reduce powder to 10–20% or use a transparent dye to maintain brightness; larger particle sizes (>15 microns) will settle faster, so plan for pigment to sink into crevices or stir periodically during the first 10 minutes to keep it suspended.
Can I Mix Resin in Bulk?
No—mixing large batches is generally not advisable because your combined resin will begin to harden within about 20 minutes, and larger volumes generate heat that shortens working time and can cause yellowing, cracking, or reduced glow; mix smaller batches or use a slow-cure resin formulated for large pours.
If you must scale up, mix in stages: for example, several 100 g batches produce far less exotherm than a single 500 g batch at 2:1; keep your mixed containers cool, pour into molds immediately, and consider a slower hardener or casting resin with a longer pot life to preserve working time and glow performance.
Advanced Techniques
You can push glow epoxy beyond a single coat by using controlled pours, color blending, and patterning; use the 2:1 epoxy-to-hardener mix and keep glow powder around 30% per batch as a starting point, stir and pour within 20 minutes to avoid premature set, and expect clear casting resin to cure in ~24 hours while fast-cast hardens in ~10 minutes — plan pours and curing windows to manage settling and layer adhesion.
- Keep individual pours thin (2–5 mm) to avoid heat and settling.
- Stir every 5–8 minutes if a long working time is needed; pigments settle after ~10 minutes.
- Use transparent dyes if adding color so UV can still charge the glow pigment.
- Test small samples: blend ratios and particle sizes affect brightness and duration.
Advanced Techniques at a glance
| Technique | Quick Tip |
|---|---|
| Layering | Pour thin layers, wait until tacky or follow manufacturer cure windows to bond successive pours. |
| Color Blends | Mix Green, Aqua, Blue in small test strips; start 70:30 ratios to dial in hue. |
| Particle Size | >15 μm settles to grooves and glows longer; <15 μm stays suspended for even opacity. |
| Patterning | Use heat gun, toothpick, or syringe pours for controlled swirls and geode effects. |
Layering Resin for Depth
When you build depth, pour successive thin layers (2–5 mm) and keep glow powder under 30% per layer to control exotherm; for clear casting resin expect about 24 hours to cure but pour subsequent layers when the previous layer is tacky or follow the resin’s recoat window to ensure mechanical bond and minimal clouding.
Combining Different Colors of Glow Powder
You can blend daytime-tinted pigments like Green Day with Aqua or Blue to create new glow hues or layer contrasting colors for a two-tone charge effect; larger particles (over 15 microns) increase glow duration while mixed micron sizes give both brightness and suspension.
For practical tests, mix small 10–20 g samples at 2:1 resin ratio with 10–30% combined powder to evaluate color and duration, try a 70:30 split to shift hue, and use transparent dyes if you want daytime tint without blocking UV charging — document each ratio so you can reproduce the result.
Creating Unique Patterns with Resin
You can form swirls, geodes, and inlays by controlling viscosity and pigment placement: warm resin slightly (within safe limits), use a syringe or dropper to place concentrated pigment dollops, then manipulate with a toothpick, canned air, or a low-power heat gun to pull and blend without over-mixing.
For a starburst or geode look, pour a clear base, add 10–30% pigment in concentrated spots, then drag outward with a pointed tool while briefly heating the surface; larger particles will sink into crevices creating luminous veins, and sanding between layers lets you reveal buried patterns for multidimensional effects.

Project Ideas
You can apply glow powder-resin mixes across small and large projects: use clear casting resin for detailed molds and two-part table top resin for bars or tabletops, mix at the 2:1 resin:hardener ratio then add pigment (many crafters use 30% for intense glow), stir continuously for the first 10 minutes to avoid settling, and pick particle size based on purpose — under 15 microns for suspension, above 15 microns to settle into grooves and inlays.
Crafts and Home Decor
Use table top resin to pour over coasters, river tables, or wood inlays where the pigment will settle into cracks; larger micron glow powders absorb more light and glow longer, making them ideal for engraved signs and edge fills, while transparent resin dyes keep daytime color without blocking UV charge — try Green or Aqua for the brightest nighttime effect.
Jewelry Making
For pendants, bezels, and cabochons use clear casting resin that cures in about 24 hours for best clarity; choose sub‑15 micron powder to stay suspended and aim for 10–20% pigment by volume if you want translucence with a visible glow, and cure under a dust‑free cover to avoid blemishes.
Layering works especially well: cast a thin base, embed small inclusions like dried flowers or metal flakes, then top with a clear layer mixed with 10–20% non‑encapsulated glow powder to preserve shine; you can speed charging with a 365 nm UV lamp for 30–60 seconds per piece, sand progressively with 400–2000 grit, and finish with a thin table top resin coat to get mirror polish without losing the pigment encased beneath.
Functional Items and Art
Create glow clock faces, lamp bases, switch plates, or countertop inlays by combining transparent dye with glow powder in clear resin so UV rays charge the pigment; use table top resin as a durable topcoat equivalent to about 50 layers of polyurethane, and exploit pigment settling to fill engraved details that remain protected by a sandable resin layer on top.
For larger pieces, mix resin in small batches (2:1 ratio) because working time is roughly 20 minutes; if you want pigment to sink into veins or sculpted textures, use 15–50 micron powders and pour in stages so each layer cures enough to trap the pigment, then finish with a thin clear coat for abrasion resistance and consistent glow across the surface.
Care and Maintenance of Glow in the Dark Resin
Best Practices for Longevity
You should protect finished pieces from prolonged UV and heat: store table-top pours out of direct sunlight and keep cured items between 60–80°F to avoid warping or yellowing. Use a clear coat of two-part table top resin or a UV-resistant spray every 6–12 months on frequently handled surfaces to maintain gloss. For wood inlays, sand to 400–600 grit and buff, then reseal; larger particle glow powders (over 15 microns) will retain light-storage capacity and resist abrasion better during finishing.
Cleaning and Storing Your Resin Creations
Clean cured resin with a soft microfiber cloth and mild dish soap; avoid abrasive pads and harsh solvents that can dull the surface. If you need to remove grease, use 70% isopropyl alcohol sparingly and dry immediately. Store flat in a dust-free area with low humidity and away from direct sunlight to minimize UV-induced yellowing and warping.
When storing multiple pieces, separate them with acid-free tissue or foam to prevent scratches and indentations—especially for thin casts or items with raised details. For long-term storage keep humidity under 60% and temperature stable; fluctuations can cause micro-cracking in epoxy over years. If you display pieces, rotate them occasionally so one side isn’t exposed to continuous light, and label storage boxes with cure dates and resin type (casting vs. table-top) to track which items may need recoat or polishing after heavy use.
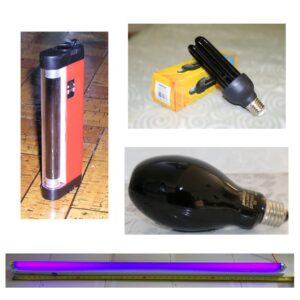
How to Recharge Glow Powders
You recharge glow pigments by exposing them to strong light: direct sunlight charges fastest while a UV LED (365–395 nm) charges more efficiently for small pieces. For typical Techno Glow powders, a 2–10 minute exposure to bright sunlight or 30–120 seconds under a 365 nm UV flashlight will produce a strong initial glow; larger-particle pigments will hold that charge longer.
For consistent results, charge pieces on a white or reflective surface to increase light bounce into the resin, and avoid opaque dyes—use transparent resin dyes so UV reaches the pigment. If you use indoor lighting, place items within 6–12 inches of a UV LED panel for 1–5 minutes for tabletop items; larger or thicker casts may need multiple cycles or longer exposure. Track charging time per project—note that heavily embedded pigments or deep pours can require double the charging time compared with thin layers.
To wrap up
Drawing together, you can create bright glow-in-the-dark epoxy for your projects by mixing resin and hardener 2:1, stirring in about 30% non-encapsulated glow powder, and working within the 20-minute pot life to avoid premature curing. Use clear resins and transparent dyes for best luminescence, stir to prevent settling (or exploit larger particles to sink into grooves), then degas, cure fully, and finish as needed.