Table of Contents
Blacklight Art & Glow: UV-Reactive Effects That Pop
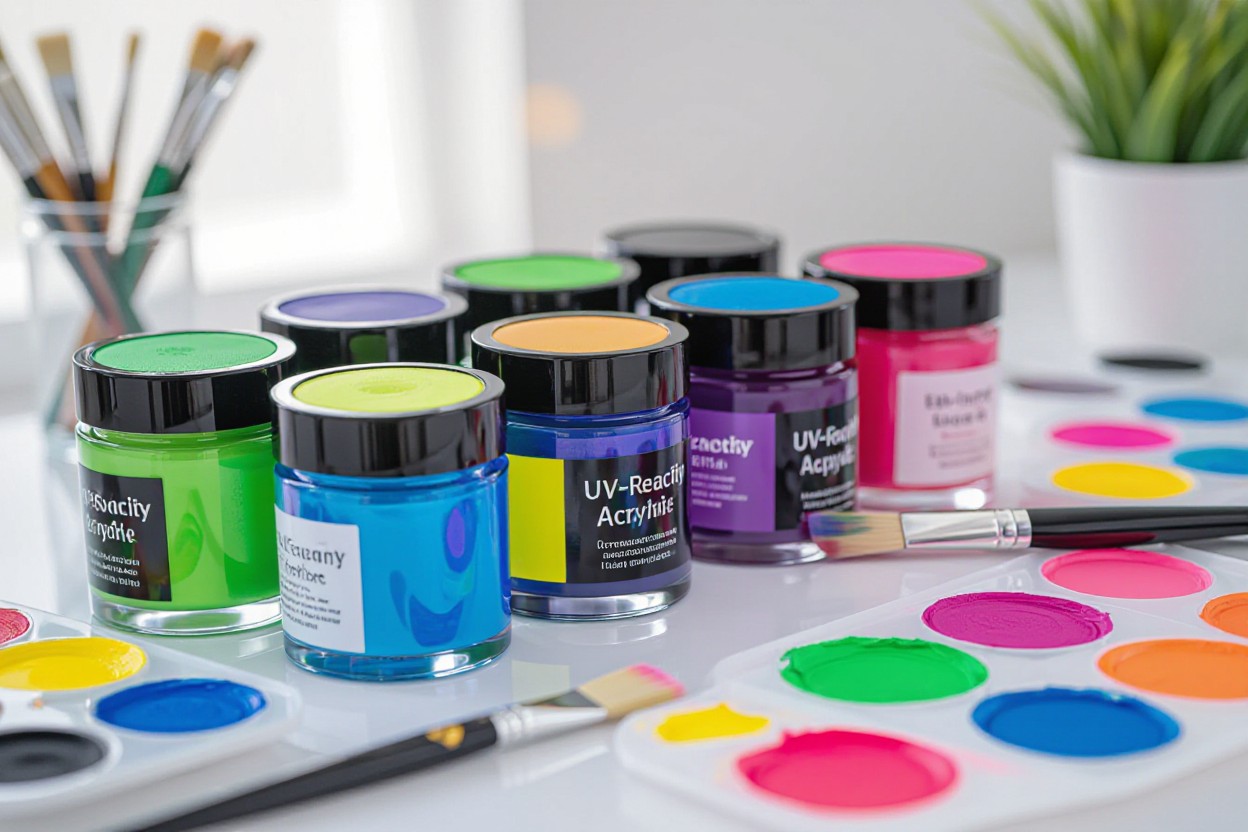
There’s a powerful way to make your work leap off the wall: UV-reactive pigments fluoresce under black light, unlike photoluminescent glow that charges in daylight, and glows in total darkness, you can layer both for richer effects; use them in galleries, performances, and installations for dramatic, immediate glow. Learn how materials like UV-reactive powder, fluorescent powder and invisible UV inks behave and follow strict safety practices because prolonged UV exposure can be hazardous to skin and eyes.
The Science Behind the Glow: Unpacking UV-Reactive Materials
You can separate effects by how materials handle light: UV-reactive pigments fluoresce instantly under black lights, while photoluminescent (glow-in-the-dark) pigments absorb light and release it slowly. Black lights emit mostly UV-A (≈365–395 nm), which excites fluorescent molecules; phosphorescent compounds like zinc sulfide glow for ~30–60 minutes, whereas strontium aluminate can emit for 8–12 hours after charging. Expect different appearance under normal light and plan layering and safety (eye/skin exposure) accordingly.
Differentiating UV-Reactive and Photoluminescent Elements
You’ll notice UV-reactive items require a UV source to pop and often look bright or colored under normal light (UV Fluorescent Powder) or nearly white (UV Light Reactive Powder), whereas photoluminescent materials store energy and glow in the dark after light exposure. Invisible inks remain unseen until UV hits them. For performance, choose fluorescent for instant, high-contrast effects and phosphorescent for after-dark persistence, mixing both for layered effects.
The Mechanics of Fluorescence Under Black Light
Molecules absorb UV photons, jump to an excited electronic state, and drop back down within nanoseconds, emitting visible light at a longer wavelength—this immediate process is fluorescence. Black lights centered at 365 nm maximize excitation for many pigments; intensity and proximity determine brightness, so your lamp wattage and distance matter when staging galleries or performances.
Material chemistry and application medium shape outcomes: high quantum-yield dyes give stronger fluorescence, while heavy pigment loading can cause concentration quenching. Binding media, surface texture, and layering with strontium aluminate or clear varnishes change persistence and color shift. You should also follow lamp safety standards (IEC 62471 guidance) because prolonged UV-A exposure can harm eyes and skin; use shields, timed exposure, and eyewear when installing or testing effects.
Designing with Light: Creative Applications in Art and Entertainment
You can exploit UV-A (commonly 365–395 nm) to sculpt perception by layering fluorescent paints, photoluminescent pigments and invisible inks; for example, combine UV Fluorescent Powder (coloured in normal light) with photoluminescent mixes that afterglow 15–60 minutes to create immediate and lingering effects. Use 365 nm LEDs for crisp fluorescence, test material compatibility, and note that non-cosmetic pigments may irritate skin while correct lamp choice yields dramatic, safe results.
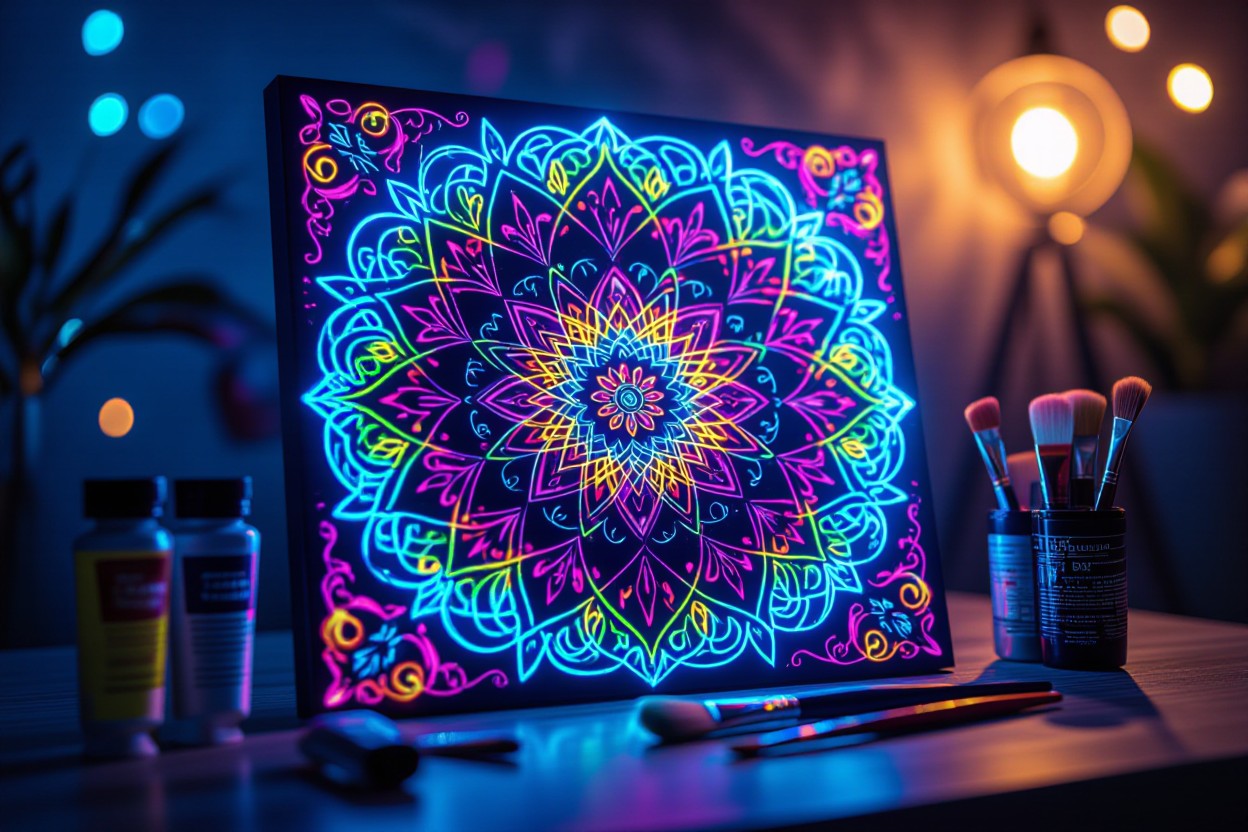
Transformative Effects in Galleries and Installations
You can reveal hidden narratives by switching between white light and black light: museums often use 365 nm fixtures to expose under drawings, invisible ink annotations, or layered fluorescence without damaging works. Motion-triggered blacklights and calibrated lux levels let you control visitor experience, and UV Light Reactive Powder (white in normal light) changing colour under UV creates surprise reveals while maintaining normal-gallery aesthetics under daylight.
Elevating Party and Performance Experiences with UV Effects
You can amplify shows by integrating UV-reactive costumes, fluorescent makeup and stage washes; clubs and festivals typically deploy 365–395 nm black lights at 1–5 mW/cm² to achieve vivid fluorescence. Pair UV Fluorescent Powder (visible in normal light) with invisible ink reveals for interactive moments, and always follow safety protocols—avoid direct eye exposure and use cosmetic-grade pigments for skin to keep effects spectacular and safe.
You can refine live setups by placing multiple 365 nm LED bars 1.5–3 m from performers for even coverage, airbrushing UV-reactive paints onto fabrics for wash-resistant results, and embedding UV Light Reactive Powder into props for colour-shifting visuals. Test combinations on stage: a 60-second blackout followed by blacklight reveals creates high-impact cues, and never substitute industrial pigments for cosmetic use—always choose products rated for skin contact and check manufacturer UV intensity guidelines.
Safeguards in the Spotlight: Navigating UV Light Usage
Use blacklights that emit in the UVA range (365–395 nm) for best fluorescence while avoiding UVB/ UVC sources that carry higher harm potential. You should position fixtures to minimize direct eye lines and avoid prolonged close-range exposure; galleries commonly keep lamps >1 m from viewers. Wearing UV-blocking eyewear and using clear signage for blacklight zones reduces accidental exposure, letting you deliver dramatic effects without compromising audience safety.
Assessing Risks and Safety Precautions
Determine hazards by reviewing product SDS for powders, inks, and pigments; many UV-reactive powders can be respiratory irritants if aerosolized, and prolonged UVA exposure can aggravate photodermatoses or cause eye irritation. You should check lamp wavelength (365–395 nm preferred), avoid bulbs with UVB/C output, and confirm ventilation, PPE availability (gloves, N95 for spraying), and first-aid plans before public runs.
Best Practices for Responsible Use
Test materials on small swatches under a 365 nm lamp to confirm visual effect and adhesion, then seal with a clear coat to prevent shedding. Keep fixtures at least 1 m away, limit continuous exposure to sessions under 1–2 hours with breaks, post warnings at entrances, and provide staff with UV-blocking goggles and spill protocols—these steps preserve audience safety while maximizing impact.
For installations, pre-screen participants for photosensitivity and restrict access for children or those on photosensitizing medications. Secure powders in labeled containers, store inks upright, and use wet-cleaning methods to avoid airborne dust. When combining UV-reactive and photoluminescent layers, you should test adhesion and cure times—apply UV-reactive powder first, check fluorescence under blacklight, then add glow-in-the-dark topcoats to create layered effects without compromising durability or safety.
Layering Aesthetics: Combining UV-Reactive and Glow-in-the-Dark Elements
Stack photoluminescent bases with UV-reactive highlights for both after-dark persistence and instant blacklight pop: apply 2–3 thin coats of strontium aluminate (lasts ~6–12 hours) as a base, then add 1–2 top layers of UV-fluorescent paint that responds to 365–395 nm blacklights for immediate color shift. Use stencils or masks to keep edges crisp and test under your actual lighting—gallery LED blacklights vs 15–40W fluorescent tubes produce different results.
Techniques for Harmonious Blending of Effects
Underpaint with photoluminescent pigment for a uniform glow, seal with a matte acrylic isolation layer, then apply UV-reactive pigments as the top layer to avoid quenching; avoid mixing powders directly unless you want a hybrid look. Use glazing, dry-brushing, or razor-edge masking to control transitions; test swatches under a 365 nm LED blacklight and under ambient dark to confirm both immediate fluorescence and long-tail phosphorescence.
Material Selection for Optimal Results
Choose strontium aluminate for long, bright afterglow and zinc sulfide only for budget or short-duration effects; prefer UV Fluorescent Powder when you need visible color in daylight and UV Light Reactive Powder when you want a white-normal → colored-under-UV surprise. Use acrylic or epoxy binders for best color retention—oil mediums can dampen fluorescence—and pick fine micron grades for smooth application without grit.
Aim for a pigment load of roughly 10–20% by weight for photoluminescent mixes in clear mediums to balance brightness and workability; for UV fluorescent powders, keep pigment percentage lower and apply thinner layers to preserve sharp fluorescence. Use N95 or better respirators and gloves—powders are respirable—and cure epoxies fully before sanding. Protect final pieces with a clear UV-stable varnish to prevent surface abrasion and maintain both fluorescence and phosphorescence.
Real-World Insights: User Experiences and Feedback
Testimonials from Artists and Creators
One installation artist wrote, “Used UV powder in my art installation—under blacklight, it’s mind-blowing,” echoing many creators who report instant audience engagement. You’ll also hear makers asking, “Curious how to mix glow-in-the-dark and UV beads—I want both effects,” which highlights demand for layered techniques. Practitioners note that UV Light Reactive Powder looks white in daylight while UV Fluorescent Powder glows vividly under blacklight, and some warn to use protective eyewear during prolonged set‑up.
Lessons Learned and Innovations from the Field
Artists achieving consistent results typically run small test panels and apply 2–3 thin coats of photoluminescent base before a UV top layer to get daytime visibility plus a nighttime pop; invisible inks are being repurposed for interactive gallery labels and scavenger hunts. You should choose mediums (acrylic gels, inks) that don’t chemically degrade pigments, and prioritize test batches to dial concentration, binder ratio, and curing times for predictable fluorescence.
Field crews discovered practical deployment rules: use long‑wave UVA blacklights (365–395 nm) for strongest fluorescence while minimizing UVB exposure, space fixtures to avoid hotspots, and measure lux under real conditions before public hours. You can replicate club and stage intensity by combining multiple low‑wattage tubes rather than a single high‑output lamp to get even coverage; documenting lamp type, distance, and substrate in a log speeds reproducible results across projects.
Final Words
Taking this into account, you can harness UV-reactive materials to make work that pops under black light by leveraging fluorescence rather than photoluminescence, selecting the right powders, inks and safety-rated UV sources. You should plan layered combos of UV-reactive and glow-in-the-dark elements for afterglow effects, test pigments under conditions matching your venue, and follow safety guidance for UV exposure so your installations dazzle without risk.
FAQ
Q: What is the difference between UV-reactive (fluorescent) materials and photoluminescent (glow-in-the-dark) materials?
A: UV-reactive (fluorescent) materials absorb ultraviolet (UV-A/blacklight) energy and immediately re-emit it as visible light, producing a bright “pop” only while UV illumination is present. Photoluminescent materials absorb visible or UV light, store energy, then slowly release it as visible light in the dark (phosphorescence), producing an afterglow that continues once light is removed. UV Light Reactive Powder typically looks white or pale under normal light and changes color under blacklight; UV Fluorescent Powder appears colored in normal light and intensifies under blacklight; invisible inks are undetectable under normal light and fluoresce under UV. Application choice depends on whether you want instant fluorescence under blacklight, sustained glow after lights go off, or a layered combination of both effects.
Q: How do UV-reactive pigments produce glowing effects under black lights?
A: Fluorescent pigments contain molecules that absorb photons in the UV range (commonly 365–395 nm for blacklights) and quickly return to a lower energy state by emitting visible photons at longer wavelengths. Emission color is set by the pigment’s chemical structure. The perceived brightness depends on pigment type, concentration, binder transparency, substrate reflectivity, and the UV source intensity. Fluorescence is immediate and stops when the UV source is removed, so blacklight placement and lamp output strongly influence how vivid the effect appears.
Q: How can I combine UV-reactive and glow-in-the-dark elements to create layered effects?
A: For layered effects, use photoluminescent materials as a base or underlayer to provide an afterglow, and apply UV-reactive pigments or inks on top for instant neon impact under blacklight. Techniques: (1) Prime or embed photoluminescent powder in a clear binder/resin as a base layer; (2) add a thin coat of fluorescent paint or ink for high-contrast highlights; (3) avoid over-mixing powders—separate layers preserve distinct behaviors; (4) test adhesion and curing compatibility (some binders quench fluorescence or reduce afterglow); (5) charge photoluminescent layers with bright visible or UV light for full brightness. For three-dimensional work, embed glow beads or powders in clear media and accent surfaces with fluorescent paints to achieve both glow and pop.
Q: What safety and lighting considerations should I follow when using blacklights and UV-reactive materials?
A: Use longwave UV-A (blacklight) sources rather than UV-B/C; UV-A is widely used for fluorescence and is lower risk but can still cause eye strain or skin sensitivity with prolonged exposure. Limit direct eye exposure, provide distance between lamps and viewers, and consider diffusers or filters where appropriate. Use proper PPE (gloves, masks) when handling powders and solvents to avoid inhalation and skin contact. Ensure adequate ventilation with solvent-based media. Check pigment and ink safety data sheets for toxicity, suitability for skin contact, and archival stability. For public events, post signage about UV use and provide seating distances or protective eyewear if using high-output UV LEDs or mercury lamps.
Q: What material selection and application tips work best for galleries, parties, and stage effects?
A: Galleries: choose archival binders and sealants compatible with fluorescent pigments; control ambient lighting and viewing angles; use framed or recessed blacklight installations and test for photobleaching over time. Parties: favor LED blacklights for lower heat and instant start-up; use safe, non-toxic fluorescent paints and washable options for body or face use; plan for moderate UV intensity to avoid discomfort. Stage/theater: specify high-output UV fixtures or professional UV LEDs, coordinate with lighting designer to balance visible and UV light so fluorescent elements read from audience seating, and ensure performers’ safety with PPE if necessary. Across contexts, select pigment particle size and concentration based on texture and opacity desired—finer powders mix smoothly into inks and resins; coarser powders give stronger scattering but may affect clarity. Always test substrates, binders, and sealers together under the intended lighting before final installation.