Glow in the Dark Epoxy: Complete How-To Guide
Learn how to mix, apply, and optimize glow in the dark epoxy for durable, high-impact finishes. This guide covers pigment selection, mixing ratios, and professional techniques to achieve strong glow performance and long-lasting epoxy resin protection.
Materials Required
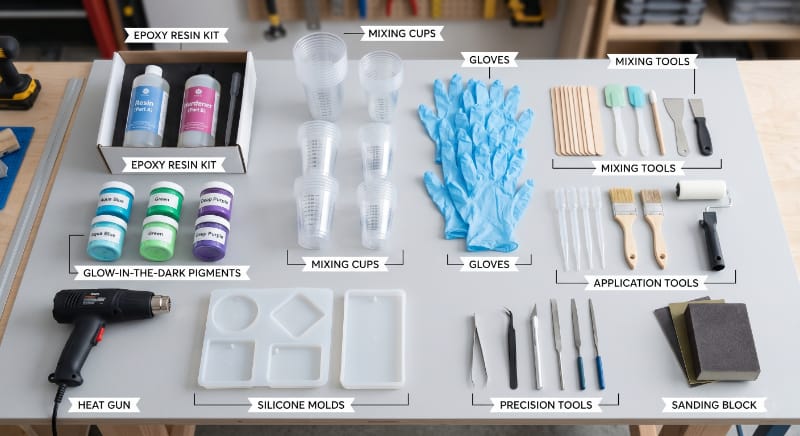
- Powder / Pigment
- Base Material
- Tools & Equipment
- Optional Upgrades
- Glow-in-the-dark pigments (Strontium Aluminate)
Best for long-lasting glow after light exposure. Ideal for functional and decorative projects. - UV pigments
React instantly under UV light but do not store energy. Best for clubs, signage, or UV-reactive designs. - Thermochromic pigments
Change color with temperature. Used for interactive or novelty effects. - Photochromic pigments
Change color under sunlight (UV exposure). Suitable for outdoor applications. - 👉 For glow in the dark epoxy, strontium aluminate pigments are the most effective.
- Epoxy Resin (Primary)
Two-part system (resin + hardener). Provides clarity, durability, and protection. - Other Compatible Bases
- Polyurethane (for flexibility)
- Polyester resin (budget option, less clarity)
- Essential:
- Mixing cups (graduated)
- Stir sticks or mechanical mixer
- Digital scale (recommended for precision)
- Nitrile gloves
- Respirator mask (for enclosed spaces)
- Measuring syringes (optional for accuracy)
- Vacuum chamber (removes bubbles)
- Heat gun or torch (bubble removal)
- Silicone molds (for casting)
- Spray gun (for specialized applications)
Mixing & Storage

- Mixing Ratio
- Storage & Lifespan
- Common Mistakes
Glow Pigments (Strontium Aluminate)
- Beginner Ratio: 1 part pigment : 4 parts epoxy (by weight)
- Pro Ratio: 1 part pigment : 2–3 parts epoxy
(Higher loading = stronger glow, but affects clarity)
UV Pigments
- 1–5% of total epoxy weight
(Small amounts are highly reactive)
Thermochromic Pigments
- 5–10% of total mix
(Too much reduces resin strength)
Photochromic Pigments
- Typically 1:1 or 2:1 (resin:hardener)
👉 Always follow manufacturer specs
Lifespan
- Mixed epoxy: 20–60 minutes working time
- Full cure: 24–72 hours
- Glow pigment shelf life: 5–10 years (if dry)
How To Store
- Store pigments in airtight containers
- Keep epoxy at 20–25°C
- Avoid humidity (causes cloudiness and curing issues)
- Keep away from direct sunlight
- ❌ Overloading pigment → weak structural integrity
- ❌ Poor mixing → uneven glow or soft spots
- ❌ Moisture contamination → bubbles and haze
- ❌ Using incorrect resin ratio → incomplete curing
Application Method
- Brush Painting
- Spray Painting
- Dipping
- Pouring
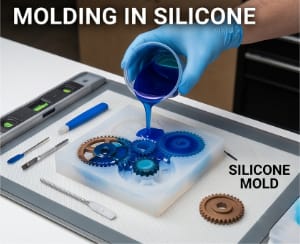
- Molding

When to Use:
- Coatings, touch-ups, small surfaces
Steps
- Prepare surface (clean, sanded)
- Mix epoxy and pigment
- Apply evenly using brush
- Allow to self-level
Best Practices:
- Use thin layers
- Avoid overworking (reduces clarity)

When to Use:
- Large surfaces, thin coatings
Steps
- Thin epoxy if required
- Use HVLP spray system
- Apply multiple light coats
Best Practices:
- Maintain even distance
- Use proper ventilation

When to Use:
- Small objects, uniform coating
Steps
- Submerge object in mixture
- Remove slowly to avoid bubbles
- Hang to cure

When to Use:
- Tables, flat surface, thick coatings
Steps:
- Pour mixed epoxy onto surface
- Spread evenly
- Remove bubbles with heat gun
When to Use:
- Custom shapes, cast objects
Steps
- Pour into silicone mold
- Tap to release air bubbles
- Cure fully before demolding
Tips for Best Results
- General
- Lighting
- Indoor vs Outdoor
- Pro Tips
- Surface Prep: Sand to 120–220 grit for best adhesion
- Layering: Build glow intensity using multiple layers
- Pigment Optimization: Use larger particle pigments for stronger glow
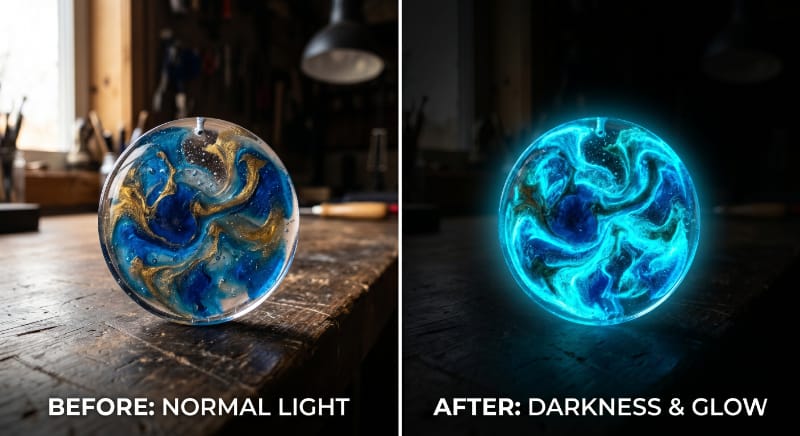
- Glow / UV Painting must be done in the dark and under UV light
- Charge with UV light for best performance
- Sunlight provides strongest charge
- Avoid weak indoor lighting especially Yellow or Green types
Unlike paints, epoxy resin is suitable for all environments
Epoxy resin and hardener form a two-part system that requires time to cure, typically between 12 and 24 hours. Once fully set, it creates a very hard, smooth surface that may become slippery. If a non-slip finish is needed, apply an anti-slip coating or spray.
Real-World Uses
Glow Epoxy River Tables
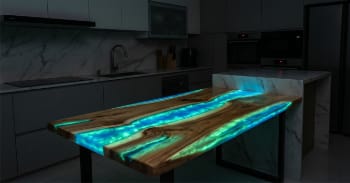
Creates stunning furniture pieces with glowing “river” effects embedded in wood slabs.
Safety Markings & Pathways
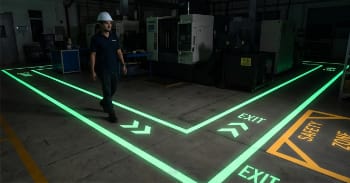
Used in walkways, stairs, and emergency exits for visibility in low-light conditions.
Decorative Art & Wall Panels
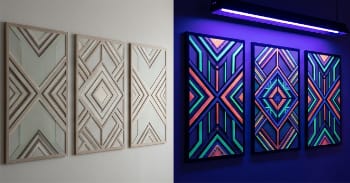
Enhances artwork with dynamic glow effects that activate in darkness.
Fishing Lures & Outdoor Gear

Improves visibility underwater or in low-light outdoor environments.