Glow in the Dark Road Markings
How photoluminescent road and lane markings can provide additional visual guidance after dark.
What Are Glow in the Dark Road Markings?
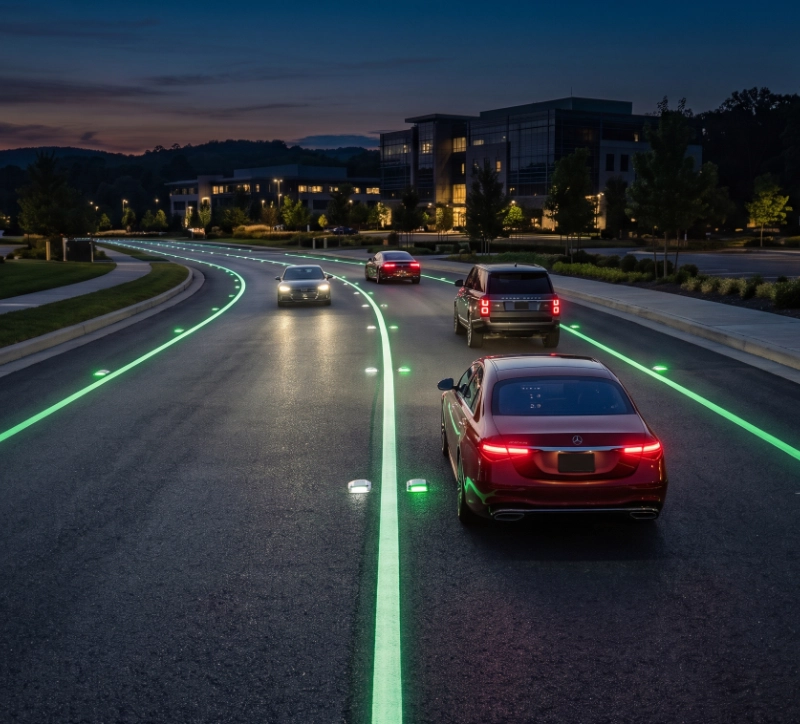
Glow in the Dark Road Markings use photoluminescent materials to create visible markings that continue to glow after the surrounding light is reduced.
Unlike conventional illuminated road systems, photoluminescent materials do not normally need a continuous electrical supply to produce their basic glow. They absorb energy from surrounding light and release it gradually when the environment becomes darker.
This makes them interesting for applications where additional visual guidance is useful without installing a continuously powered lighting system.
However, there is an important distinction between supplementary glow markings and legally prescribed road markings.
In Singapore, LTA publishes detailed road-marking standards covering the dimensions, colours and materials used for many road markings. Its current Standard Details of Road Elements include thermoplastic road-marking specifications and identify SS 589:2013 as the applicable standard for thermoplastic road-marking materials.
Therefore, a photoluminescent coating should not simply be painted over an existing public-road marking and assumed to become an approved replacement.
For a commercial project, the correct approach is to establish the purpose of the marking first, determine whether it is a regulated traffic marking or a supplementary visual feature, and then select the appropriate system.
Benefits
Depending on the application, photoluminescent road markings can offer:
- Additional low-light visual guidance.
- Better visibility of selected routes after dark.
- Passive operation without continuous electrical power.
- Continuous or segmented visual lines.
- Integration with conventional road markings.
- Potential use on private roads and pedestrian routes.
- Additional visual definition around corners, crossings or pathways.
- A distinctive appearance for recreational and commercial environments.
The main benefit is visual guidance, rather than replacing normal street lighting or legally required road markings.
Typical Uses
Potential applications include:
- Private roads
- Commercial developments
- Car parks
- Pedestrian pathways
- Cycle paths
- Private estates
- Resorts
- Parks
- Driveways
- Recreational facilities
- Theme parks
- Outdoor attractions
- Industrial sites
- Warehouse yards
- Low-speed internal roads
For public roads, expressways or other regulated traffic environments, obtain approval from the relevant authority before proposing a photoluminescent road-marking system.
How Glow Road Markings Work
- How It Works
- Key Facts
- Advantages
- Professional Tip
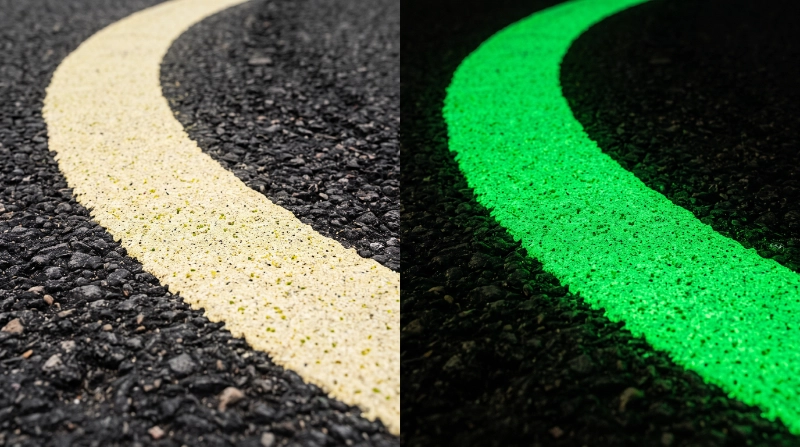
Photoluminescent materials absorb light during the charging period.
During daylight or normal artificial lighting, the material stores energy.
When the surrounding environment becomes dark, the stored energy is released gradually as visible light.
For a road marking system, this means a painted line, symbol or defined area can remain visually identifiable after the conventional light source has been reduced.
The glow is passive. It does not require a battery or continuous electrical connection.
However, the material must receive adequate charging light before it can produce useful after-dark visibility.
The performance also depends on the thickness and formulation of the coating, the photoluminescent material used, surface condition, temperature and surrounding darkness.
- Photoluminescent markings require charging light.
- Glow is strongest after adequate charging and gradually decreases.
- The coating must be suitable for the intended substrate.
- Road surfaces experience considerable abrasion and contamination.
- Vehicle traffic can significantly affect coating durability.
- Road markings must remain safe and clearly defined during the day.
- Conventional traffic markings may still be required.
- Public-road applications may require authority approval.
- A glow marking should not automatically be considered a substitute for street lighting.
ASTM E2072-24 is an active specification covering minimum photometric requirements for photoluminescent safety markings, including coatings and other marking materials. It is intended for supplementary safety markings rather than being a universal specification for ordinary traffic lane markings.
Passive Glow
The photoluminescent material can provide visibility without continuous electrical power.
Flexible Design
Glow Paint can be applied as lines, symbols, borders or other custom patterns where the coating system is appropriate.
Additional Guidance
Photoluminescent markings can supplement conventional lighting and markings.
Multiple Applications
The technology can be considered for roads, pathways, car parks, recreational areas and private developments.
Low-Level Visual Reference
A glowing line close to the ground can provide a useful visual reference in dark surroundings.
Integration
Photoluminescent markings can potentially be combined with conventional road markings and Glow Road Studs.
Professional Tip
During application, periodically switch off the lights and inspect your work using a UV black light. This reveals missed areas, uneven coverage and ensures the best glow performance. The same technique is recommended for UV reactive paints as the black light immediately reveals the finished effect.
For large road-marking projects, inspect the entire route rather than checking only a small test area. Uneven coating thickness or missed sections can become much more obvious after dark.
Types of Glow Road Markings
Glow Lane Edge Markings
Photoluminescent lines can be used to create a visible edge along suitable private roads, pathways or internal traffic routes.
This can be particularly useful where a route needs to remain visually defined after normal lighting is reduced.
For public roads, however, lane and edge markings must follow the relevant road authority's requirements.
Glow Street Markings
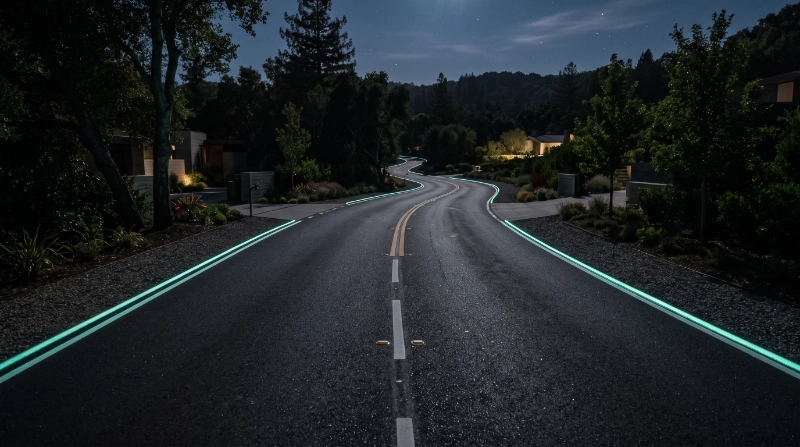
Glow Street Markings can be used as supplementary visual guidance on suitable private streets, estates and internal roads.
They may be designed as continuous lines, segmented markings or selected visual zones.
The exact design should reflect the purpose of the marking rather than simply copying conventional public-road markings.
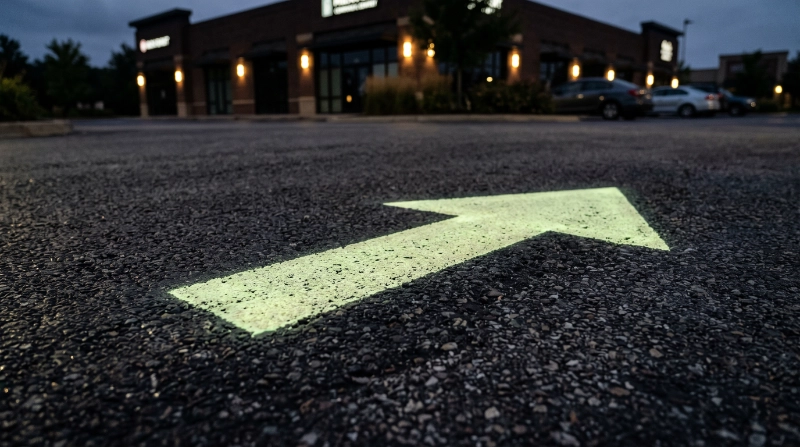
Glow Road Symbols
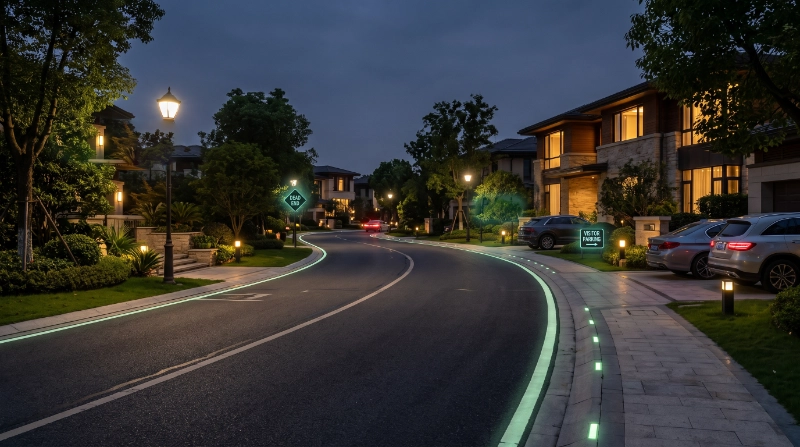
Instead of continuous lines, Glow Paint can potentially be used to create selected symbols or directional features on suitable surfaces.
Examples include:
- Arrows
- Directional indicators
- Route borders
- Pedestrian symbols
- Recreational markings
- Custom visual guides
Where a symbol has a regulated traffic meaning, the design must comply with the applicable requirements.
Glow Pathway Markings
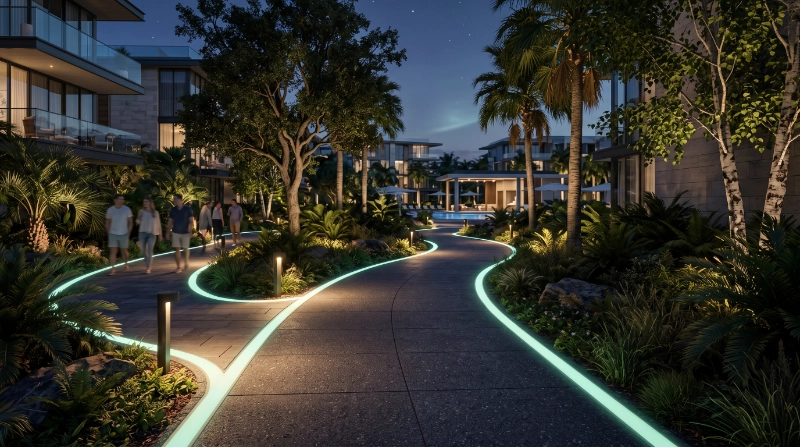
Pedestrian pathways are often easier to adapt than public roads because the marking can be designed primarily as a visual guidance feature.
Photoluminescent lines can define:
- Pedestrian routes
- Cycle paths
- Park pathways
- Resort paths
- Recreational trails
- Building approaches
This is one of the more practical applications where a glow marking can complement existing lighting.
Glow Road Studs
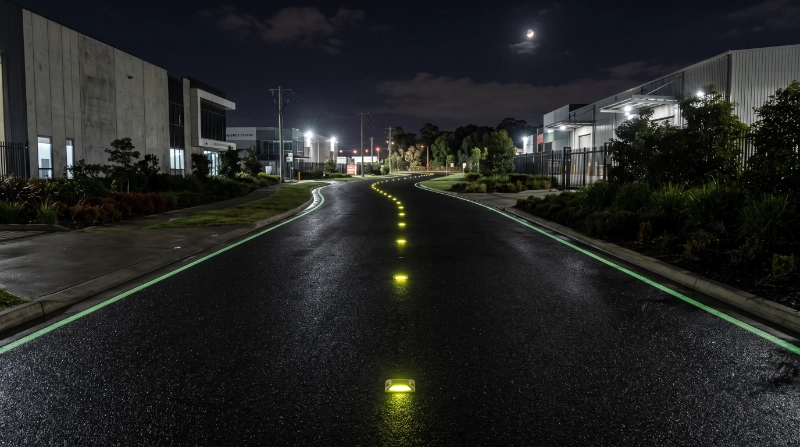
Glow Road Studs can be used alongside painted markings to create regularly spaced visual points.
They are particularly useful where a continuous painted line is not required or where additional route definition is desirable.
The suitability of road studs depends heavily on traffic loading, installation method, surface and local requirements.
Day vs Night Appearance

- Day Appearance
- Night Appearance
- Lighting
- Best Results
During the day, a road-marking system should look clean, intentional and professionally installed.
For a commercial application, the visual appearance matters because the marking needs to work alongside:
- Conventional road markings
- Kerbs
- Drainage
- Signs
- Pedestrian routes
- Street furniture
- Other traffic-control features
Glow Paint should therefore not be selected purely because it glows.
The complete marking system must remain appropriate for its intended environment.
When the surrounding light decreases, the photoluminescent material becomes visible.
A continuous line can appear as a glowing route, while individual road studs can create a sequence of glowing points.
The visual effect is particularly noticeable when the surrounding environment is genuinely dark.
In areas with strong street lighting, vehicle headlights or extensive ambient illumination, the glow may be less visually prominent.
Charging is one of the most important considerations.
Potential charging sources include:
- Sunlight
- Daylight
- LED lighting
- Fluorescent lighting
- Other suitable artificial light
The actual site should be assessed before installation.
A section of road hidden beneath a structure or permanently shaded by surrounding buildings may receive less charging light than an exposed area.
A UV black light can be useful during application and inspection, but it should not be treated as a substitute for the site's normal charging conditions.
For the best practical result:
- Start with a clean, suitable substrate.
- Use a coating system compatible with the surface.
- Follow the manufacturer's preparation requirements.
- Apply consistent coating coverage.
- Allow the system to cure fully.
- Check adhesion before opening the area to traffic.
- Inspect the marking under normal and low-light conditions.
- Consider vehicle loading and abrasion.
- Provide conventional lighting where required.
- Treat glow markings as supplementary unless formally approved as part of a required system.
For public-road applications, LTA's current design-criteria page identifies the Standard Details of Road Elements Revision I, March 2026, as the current reference for common road elements.
Brightness Expectations
- Brightness
- Charging
- Glow Duration
- Performance Factors
The brightness of Glow in the Dark Road Markings depends on the type and concentration of photoluminescent material, coating thickness, charging conditions and surrounding darkness.
A freshly charged marking will normally appear brighter than one that has been glowing for several hours. The visual effect also depends on the surrounding environment. A marking may appear very bright in a completely dark area but much less noticeable beside strong street lighting.
For commercial projects, it is better to specify measurable product performance rather than promise a fixed visual result.
Photoluminescent road markings need to receive light before they can glow.
Possible charging sources include:
- Direct sunlight
- Daylight
- LED lighting
- Fluorescent lighting
- Other suitable artificial light
The site should be assessed for its actual lighting conditions.
A road section beneath a covered structure, bridge or building may receive considerably less charging light than an exposed section.
UV light can charge photoluminescent materials very effectively and can be useful during testing. However, the permanent system should be designed around the normal lighting available at the site.
Glow intensity gradually decreases after the charging source is removed.
The useful duration depends on:
- Photoluminescent material
- Initial charging level
- Charging time
- Coating formulation
- Coating thickness
- Ambient temperature
- Surface cleanliness
- Surrounding darkness
- Age and condition of the marking
Avoid describing every Glow Paint system as having the same glow duration.
For a commercial installation, use the manufacturer's technical data and, where appropriate, conduct a site trial before committing to a large area.
| Factor | Effect on Performance |
|---|---|
| Strong charging light | Increases initial glow |
| Longer charging period | Allows more energy to be stored |
| Photoluminescent concentration | Influences glow intensity |
| Coating thickness | Can influence overall performance |
| Clean surface | Helps maintain visible performance |
| Heavy traffic | Can reduce coating life through abrasion |
| Dirt and tyre deposits | Can reduce visible glow |
| Strong surrounding lighting | Makes the glow appear less prominent |
| Dark surroundings | Makes the glow easier to see |
| Weather exposure | May affect long-term coating performance |
Choosing Products
| Product | Best For | Location | Difficulty | Notes |
|---|---|---|---|---|
| Glow Paint | Painted road lines, borders and symbols on suitable surfaces | Outdoor | Hard | Suitable formulation and surface preparation are essential. |
| Glow Powder | Custom coating formulations | Outdoor | Hard | Glow Powder is the same material as Glow Pigment and must be incorporated into a suitable binder. |
| Glow Primer | Preparing compatible surfaces | Outdoor | Hard | Useful where the substrate requires a compatible primer before Glow Paint. |
| Glow Road Studs | Complementary point-based visual guidance | Outdoor | Hard | Traffic loading, fixing method and installation conditions must be considered. |
| Glow Signs | Directional or warning information | Indoor / Outdoor | Moderate | Better suited to signs and visual information than painted lane markings. |
*Outdoor suitability depends on the exact product, substrate, weather exposure, traffic loading and installation system.
Recommended Products
For a commercial road-marking project, the most relevant Darknite Glow products are:
Glow Paint — for continuous painted lines, borders and selected symbols.
Glow Primer — where the substrate requires priming before the Glow Paint system is applied.
Glow Road Studs — for complementary point-based visual guidance.
Glow Powder — for manufacturers or specialist contractors developing their own compatible coating system.
Recommended Approach: For most commercial applications, consider a combination of Glow Paint + suitable Glow Primer + Glow Road Studs, rather than relying on a single product for every requirement.
Where a quick, clean installation is preferred, glow safety tape provides a practical alternative to painted or embedded markings. See our Glow Safety Tape options for creating visible pathways, edges and hazard markings.
Materials for Road Markings
Depending on the surface and installation method, glow-in-the-dark road and pathway markings can be created using coatings, embedded materials or adhesive products such as Glow Safety Tape.
Other Safety Applications
Road markings are only one part of a wider photoluminescent safety system. For stairs, emergency routes and building safety, see our Glow Stair Nosing Guide and Emergency Exit Systems Guide.
Surface Preparation & Application
Photoluminescent materials are also useful for outdoor pathways, landscaping and other low-light environments. Explore our Glow in the Dark Applications Guide for additional project ideas.
Surface Preparation
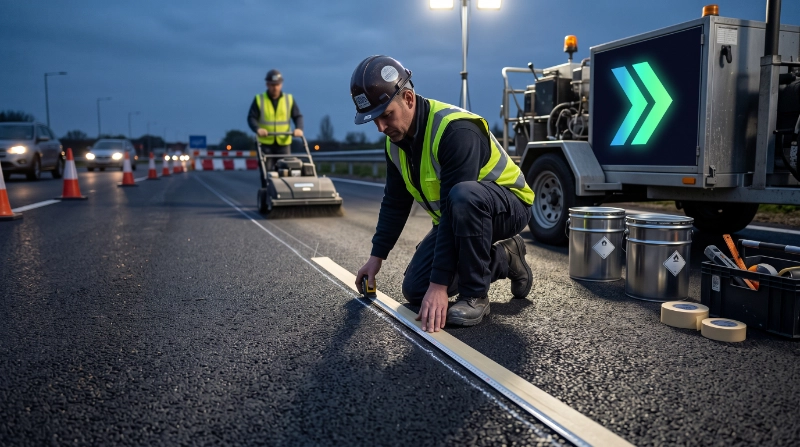
The quality of the substrate has a major effect on the finished marking.
Before application:
- Remove loose dirt and debris.
- Remove oil, grease and other contaminants.
- Allow the surface to dry.
- Repair loose or damaged areas.
- Remove unsuitable old coatings where necessary.
- Confirm that the surface is compatible with the proposed coating system.
- Carry out a small adhesion test where appropriate.
For asphalt, concrete and other road surfaces, the preparation method may differ.
Do not assume that a coating suitable for a smooth indoor floor will automatically withstand vehicle traffic outdoors.
Materials Needed
Depending on the project:
- Glow Paint
- Glow Primer where required
- Glow Powder for custom formulations
- Glow Road Studs
- Measuring equipment
- Straight edges
- Marking chalk
- Masking materials
- Application rollers or suitable road-marking equipment
- Cleaning equipment
- UV black light
- PPE
- Traffic-control equipment
For a commercial project, application equipment should be selected according to the size of the marking and the required consistency.
Application Steps
Step 1 — Plan the Marking
Determine exactly where the glow marking will be positioned.
Define:
- Line width
- Line length
- Symbols
- Spacing
- Road edges
- Pedestrian routes
- Stud positions
Do not begin painting until the complete layout has been established.
Step 2 — Prepare the Surface
Clean, dry and prepare the substrate according to the coating system's requirements.
Step 3 — Prime Where Required
If the substrate requires Glow Primer, apply it according to the manufacturer's instructions and allow the required drying or curing time.
Step 4 — Apply Glow Paint
Apply the Glow Paint evenly and consistently.
Avoid thin patches, excessive pooling and irregular edges.
For large commercial projects, a controlled application system is preferable to trying to maintain consistency manually over a large area.
Step 5 — Install Glow Road Studs
Where used, position Glow Road Studs according to the planned layout and secure them using the appropriate installation method.
Step 6 — Cure
Keep traffic away from the treated area until the coating system has achieved the required cure.
Step 7 — Inspect
Inspect the marking under normal lighting and in darkness.
Use a UV black light during inspection to identify uneven coverage or missed areas.
Professional Tips
Professional Tip
During application, periodically switch off the lights and inspect your work using a UV black light. This reveals missed areas, uneven coverage and ensures the best glow performance. The same technique is recommended for UV reactive paints as the black light immediately reveals the finished effect.
For large commercial projects, create a test section first.
This allows you to evaluate:
- Appearance
- Charging
- Glow intensity
- Adhesion
- Drying
- Traffic resistance
- Cleaning requirements
before applying the system across the complete site.
Safety Notes
- Use appropriate PPE.
- Keep workers away from active traffic.
- Follow the coating manufacturer's safety instructions.
- Provide adequate ventilation where required.
- Follow drying and curing times.
- Use appropriate traffic management.
- Do not reopen the area until the coating is ready for the expected traffic.
- Never shine UV lights directly into the eyes.
For public roads or controlled traffic areas, the appropriate authority and traffic-management requirements must be established before work begins.
Common Mistakes
Treating Glow Paint as a Replacement for Standard Road Markings
Why it happens:
The glow looks highly visible at night, so it may be assumed that it can replace conventional road markings.
How to avoid it:
Determine whether the marking has a regulated traffic function. Where conventional markings are required, retain the approved system and use photoluminescence only where appropriate and permitted.
Applying Glow Paint to a Dirty Road Surface
Why it happens:
Outdoor asphalt and concrete can contain dust, oil, tyre residue and other contaminants.
How to avoid it:
Clean and prepare the substrate thoroughly before application.
Ignoring Vehicle Traffic
Why it happens:
A coating may perform well on a pedestrian pathway but experience much greater stress from vehicles.
How to avoid it:
Consider traffic volume, vehicle weight, turning movements, braking and tyre abrasion before selecting the system.
Insufficient Charging Light
Why it happens:
The road appears adequately lit during the day, but the actual marking receives insufficient light.
How to avoid it:
Assess the charging environment throughout the day and consider shaded sections separately.
Applying an Uneven Coating
Why it happens:
Large areas are difficult to coat consistently using uncontrolled manual application.
How to avoid it:
Use suitable road-marking equipment and establish a test section before full-scale application.
Forgetting Conventional Lighting
Why it happens:
The glow effect can make the installation appear sufficient on its own.
How to avoid it:
Treat photoluminescent markings as supplementary unless the complete system has been specifically designed, tested and approved for the intended safety application.
Using the Same System Everywhere
Why it happens:
A single product appears easier to specify.
How to avoid it:
Use the most appropriate combination of Glow Paint, Glow Primer, Glow Road Studs and other products for each section of the site.
Skipping the Test Area
Why it happens:
The contractor wants to proceed directly to the full installation.
How to avoid it:
Create a representative test section and evaluate appearance, adhesion, charging and durability before committing to the entire project.
Key Takeaways
- Glow in the Dark Road Markings can provide additional visual guidance after dark.
- Photoluminescent markings require adequate charging light before they can glow.
- Glow Paint can be used for suitable lines, borders and custom markings.
- Glow Road Studs can complement painted markings with regularly spaced visual reference points.
- Road traffic, abrasion, weather and surface contamination must be considered when selecting a coating system.
- Public-road markings may be subject to specific road authority requirements and should not be replaced with Glow Paint without approval.
- A test section is strongly recommended for commercial projects before full-scale application.
- Photoluminescent road markings work best as part of a properly planned overall lighting and visual-guidance system.
Road markings are only one part of a wider photoluminescent safety system. For stairs, emergency routes and building safety, see our Glow Stair Nosing Guide and Emergency Exit Systems Guide.
Photoluminescent materials are also useful for outdoor pathways, landscaping and other low-light environments. Explore our Glow in the Dark Applications Guide for additional project ideas.
Looking for more glow-in-the-dark ideas,
techniques and applications?
Explore our complete guide.