Glow in the Dark Safety Signs
A practical guide to photoluminescent signs, DIY Glow Photo Paper, ready-made Glow Signs and custom safety signage.
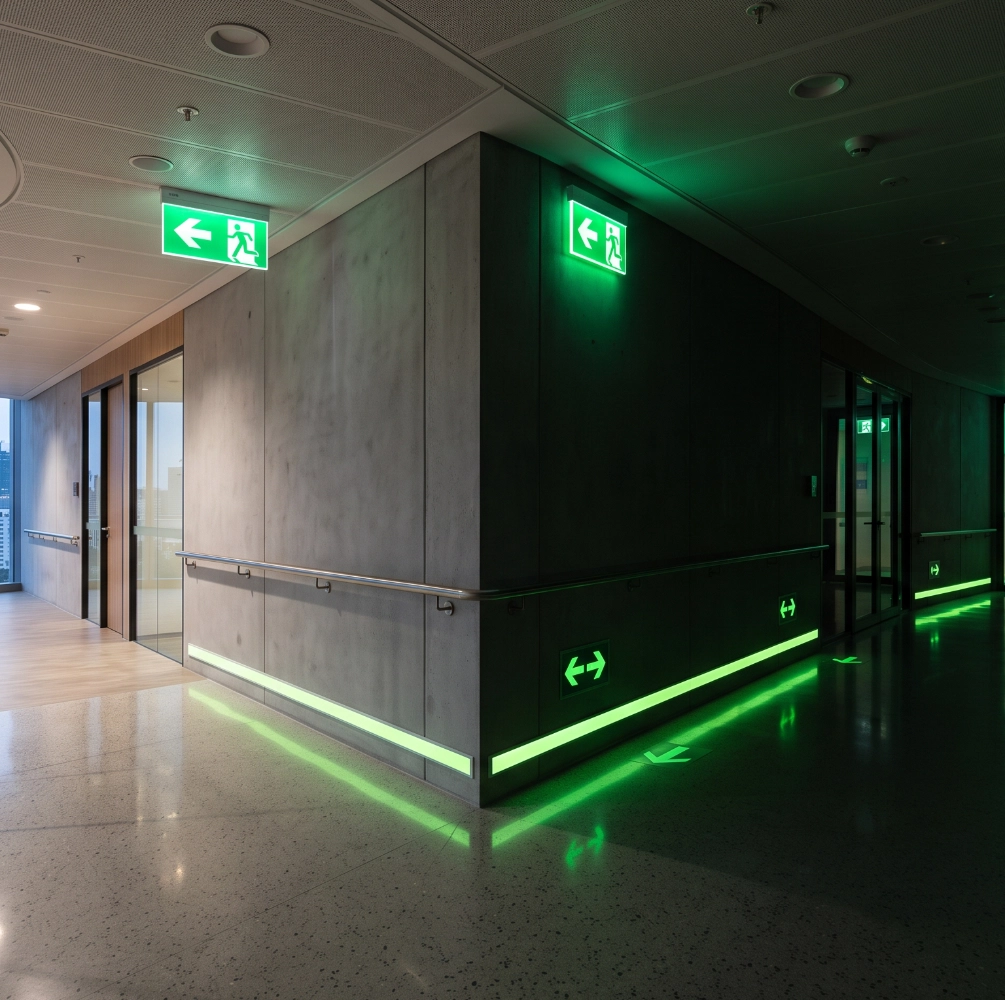
Understanding Glow in the Dark Safety Signs
Glow in the dark safety signs use photoluminescent material to remain visible after exposure to light.
During normal conditions, the material absorbs energy from surrounding light. When the lights are switched off or the environment becomes darker, the stored energy is gradually released as visible light.
This makes photoluminescent signs useful for identifying exits, directions, stairs, equipment and other important locations in low-light environments.
There are several ways to create this type of signage.
A business can purchase ready-made Glow Signs, order custom Glow Signs with specific wording or symbols, or create simple signs themselves using Glow Photo Paper and a suitable printer.
The best option depends on the application, required durability, quantity, appearance and whether the sign forms part of a regulated safety system.
Benefits
Glow in the dark signage can provide:
- Visibility when normal lighting is reduced.
- Easy identification of important locations.
- Passive operation without continuous electrical power.
- Low-level directional guidance.
- Customisable designs.
- Simple DIY options for non-regulated applications.
- Ready-made options for common safety symbols.
- Custom manufacturing for specific requirements.
Photoluminescent signs can be particularly useful in corridors, stairways, workshops, commercial premises, entertainment venues and other areas where additional low-light visibility is desirable.
For regulated emergency applications, however, the sign must meet the applicable building and fire-safety requirements.
Typical Uses
Glow safety signs can be used for:
- Emergency exit identification
- Fire exit signs
- Directional arrows
- Stairway markings
- Assembly point identification
- Fire equipment identification
- Door identification
- Corridor guidance
- Low-level pathway markings
- Hazard identification
- Equipment labels
- Temporary event signage
- Decorative safety signs
How Glow in the Dark Safety Signs Work
- How It Works
- Key Facts
- Advantages
- Professional Tip
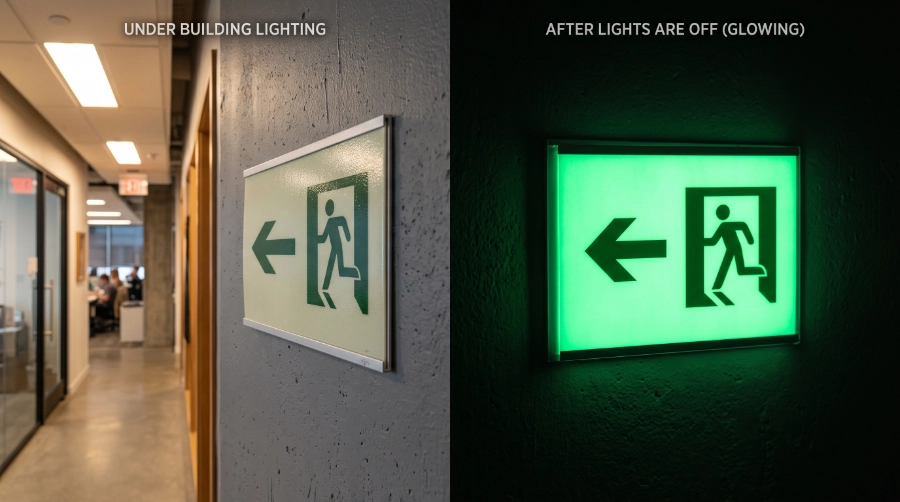
A photoluminescent safety sign contains a material that absorbs energy from light.
During normal operation, daylight or artificial lighting charges the photoluminescent material.
When the surrounding light is reduced, the material releases the stored energy as visible light.
The sign therefore does not need to generate light in the same way as an electrically powered illuminated sign.
This makes photoluminescent signage particularly useful where passive visibility is desirable.
However, the sign needs sufficient charging light to perform effectively.
A sign installed in a permanently dark location cannot be expected to provide the same performance as one exposed to suitable lighting during normal operation.
- Photoluminescent signs absorb and store light.
- They glow after the charging light is reduced or removed.
- The glow gradually becomes less intense.
- Charging conditions affect performance.
- Different products have different performance characteristics.
- Dirt and physical damage can reduce visibility.
- The substrate and installation method affect durability.
- Regulated safety applications may have specific performance requirements.
Passive Visibility
Photoluminescent signs do not require continuous electrical power to produce their basic glow.
Easy Identification
Bright symbols and contrasting designs can help people locate important areas in low-light conditions.
Flexible Installation
Signs can be produced in different sizes and formats for walls, doors, corridors and other suitable surfaces.
Customisation
Businesses can create custom signs for specific locations, languages, directions and applications.
DIY Possibilities
For simple non-regulated applications, Glow Photo Paper allows users to print their own designs.
Professional Tip
During application, periodically switch off the lights and inspect your work using a UV black light. This reveals missed areas, uneven coverage and ensures the best glow performance. The same technique is recommended for UV reactive paints as the black light immediately reveals the finished effect.
For Glow Signs, this inspection is useful when checking the actual visibility of the finished sign in a dark environment.
Types of Glow in the Dark Safety Signs
Ready-Made Glow Signs
They are convenient where a standard sign is required and can save time compared with creating a sign from scratch.
Typical examples include:
- Exit symbols
- Directional arrows
- Fire equipment signs
- Stairway signs
- General warning symbols
For regulated applications, always verify that the sign meets the relevant requirements before installation.
Custom Glow Signs
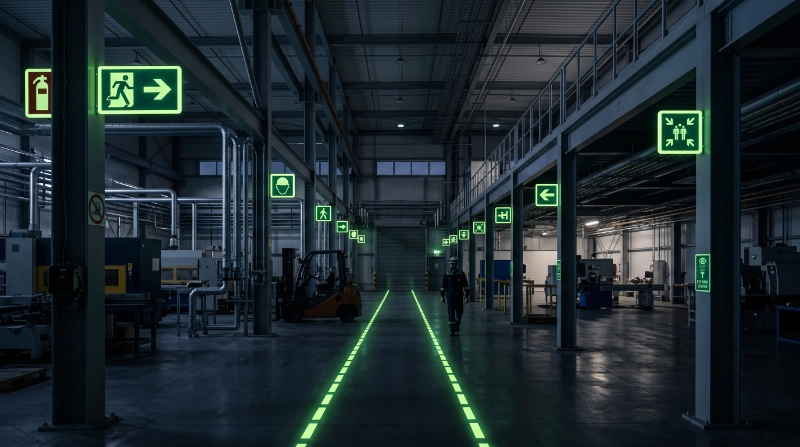
Custom Glow Signs can be produced for applications where standard signage does not provide the required information.
Customisation may include:
- Text
- Symbols
- Directional arrows
- Company-specific information
- Room identification
- Special instructions
- Different sizes and layouts
Custom signs are particularly useful for large commercial or industrial projects where consistent signage is required throughout a building.
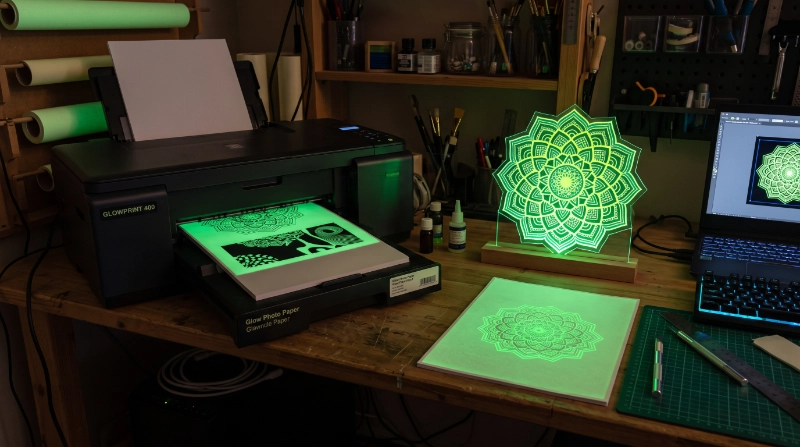
DIY Glow Signs with Glow Photo Paper
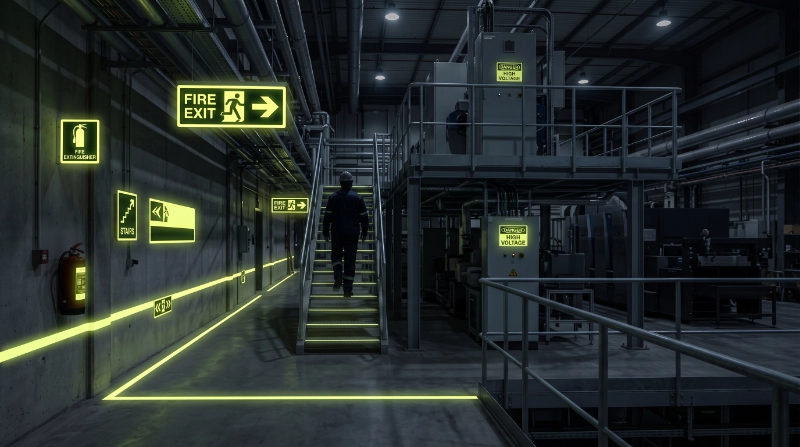
For simple decorative, educational or non-regulated applications, Glow Photo Paper provides a convenient DIY option.
A user can create artwork or signage on a computer and print it onto suitable Glow Photo Paper using a compatible printer.
This makes it possible to produce:
- Custom arrows
- Room signs
- Decorative safety messages
- Children's educational signs
- Event signage
- Personalised glow artwork
DIY printed signs should not automatically be used as certified emergency signage..
DIY Glow Signs
DIY signs can be created using suitable photoluminescent coatings and materials. Glow Paint can be useful when creating custom markings or graphics directly on compatible surfaces.
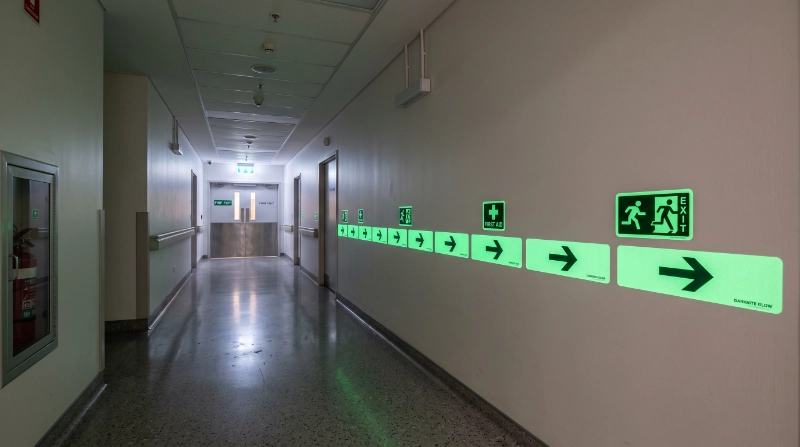
Glow Stickers
Glow Stickers provide a simple way to add photoluminescent symbols, arrows and markings to suitable surfaces.
They are useful when:
- Installation needs to be quick.
- A removable or replaceable marking is preferred.
- Individual symbols are required.
- Low-level directional markings are needed.
The surface must be clean, dry and suitable for the adhesive.
AI Image Prompt
Photorealistic modern emergency corridor featuring professionally installed photoluminescent glow stickers with directional arrows and safety symbols, clean wall surfaces, realistic low-light environment, premium architectural photography, Darknite Glow branding style, no text, no watermark, 16:9.
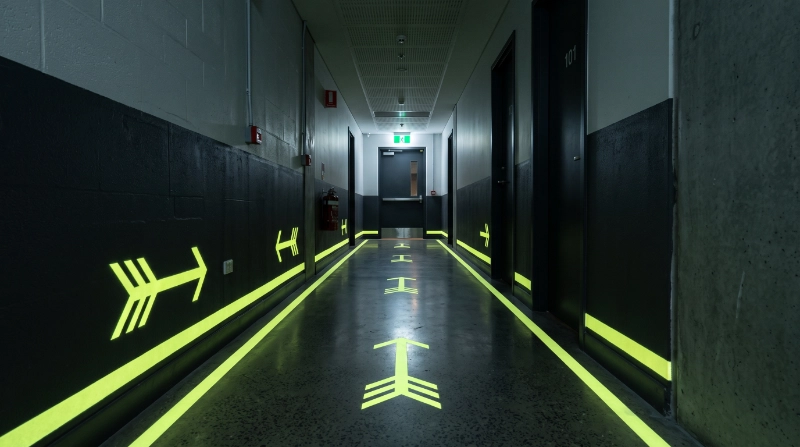
Glow Paint Safety Markings
For larger areas or customized permanent markings, Glow Paint can be applied to suitable surfaces.
It can be used to create:
- Directional lines
- Arrows
- Borders
- Floor-level markings
- Wall markings
- Custom symbols
The surface must be properly prepared and the Glow Paint system selected for the intended substrate.
For regulated safety applications, the finished marking must meet the applicable requirements rather than being selected simply because it glows.
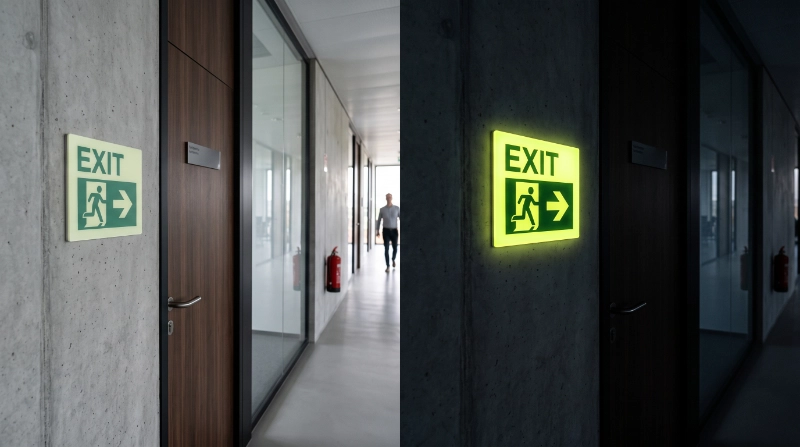
Day vs Night Appearance
- Day Appearance
- Night Appearance
- Lighting
- Best Results
Under normal lighting, a Glow Sign should look like a conventional professional safety or directional sign.
Depending on the material and design, the photoluminescent surface may appear white, pale or lightly coloured.
This makes the sign easy to integrate into commercial and industrial environments.
The charging light is also important during the day.
Photoluminescent signage needs adequate exposure to suitable light to build up its stored energy.
When the surrounding lighting is reduced, the photoluminescent material begins releasing its stored energy.
The sign becomes visibly luminous, making the symbol or message easier to identify against a dark background.
The glow is normally strongest shortly after sufficient charging and gradually decreases.
The actual brightness depends on the product specification, charging conditions, viewing distance and surrounding darkness.
Photoluminescent signs can be charged by suitable ambient lighting, including:
- Daylight
- LED lighting
- Fluorescent lighting
- Other suitable artificial light sources
A UV black light can also be used to charge and inspect photoluminescent materials during testing.
However, a permanently installed safety system should be designed around its normal operating conditions and applicable regulations.
The sign should not depend on someone manually charging it immediately before an emergency.
For effective glow in the dark signage:
- Install signs where they receive adequate charging light.
- Keep the sign unobstructed.
- Use strong contrast between the symbol and background.
- Keep surfaces clean.
- Replace damaged signs.
- Use appropriate sizes for viewing distance.
- Position directional signs consistently.
- Create a continuous visual route where route guidance is required.
For safety applications, always assess the complete route rather than judging individual signs separately. A bright sign is of limited value if the next stage of the escape route is difficult to identify.
Brightness Expectations
- Brightness
- Charging
- Glow Duration
- Performance Factors
The brightness of glow in the dark safety signs depends on the quality of the photoluminescent material and the amount of light absorbed before the surrounding lighting is reduced.
Important factors include:
- Quality of the photoluminescent material.
- Charging light intensity.
- Charging duration.
- Distance from the charging light.
- Sign size and design.
- Ambient darkness.
- Age and condition of the sign.
- Dirt or surface contamination.
A sign that looks very bright immediately after charging will gradually become less bright.
For regulated applications, performance should be assessed against the applicable standard or fire-safety requirement rather than judged by appearance alone.
Photoluminescent signs need sufficient exposure to light during normal operation.
Suitable charging sources can include:
- Daylight
- LED lighting
- Fluorescent lighting
- Other suitable artificial lighting
A UV black light can also be useful for rapidly charging a sample during testing.
The important point is that the installed sign must receive adequate charging light under normal building conditions.
Do not install a sign where furniture, equipment, doors or architectural features permanently block the charging light.
Photoluminescent signs do not remain at their initial maximum brightness indefinitely.
After the charging source is removed, the stored energy is gradually released and the visible glow decreases.
The rate of decline depends on the product and environmental conditions.
For this reason, avoid making absolute claims such as "this sign will glow for X hours" unless that performance is supported by the specific product's test data.
| Factor | Effect |
|---|
| Strong charging light | Helps maximise initial glow |
| Adequate charging time | Increases stored energy |
| High-quality photoluminescent material | Provides more consistent performance |
| Dark surroundings | Makes the glow easier to see |
| Clean sign surface | Maintains visibility |
| Dirt or contamination | Can reduce visible brightness |
| Physical damage | Can affect the sign's appearance and performance |
| Ageing | May affect long-term appearance and performance |
Choosing Products
| Product | Best For | Location | Difficulty | Notes |
|---|---|---|---|---|
| Glow Signs | Ready-made safety and directional signage | Indoor/Outdoor | Easy | Convenient for standard applications. |
| Custom Glow Signs | Special wording, symbols or sizes | Indoor/Outdoor | Easy | Useful for commercial and industrial projects. |
| Glow Stickers | Individual symbols, arrows and markings | Indoor/Outdoor | Easy | Quick to install on suitable clean surfaces. |
| Glow Photo Paper | DIY printed signs and decorative applications | Indoor | Easy | Best for non-regulated DIY and creative uses. |
*Outdoor suitability depends on the specific product and environmental exposure.
Recommended Products
For this type of application, the most useful Darknite Glow products are:
- Glow Signs — ready-made photoluminescent signage.
- Custom Glow Signs — for project-specific requirements.
- Glow Stickers — for quick individual markings.
- Glow Photo Paper — for DIY printed glow signs.
- Glow Paint — for customised permanent markings.
Which Option Should You Choose?
Choose ready-made Glow Signs when:
- You need common safety symbols.
- You want a quick installation.
- You need consistent signage across a building.
Choose Custom Glow Signs when:
- You need specific wording.
- Standard signs are unsuitable.
- You need particular sizes or layouts.
- A large project requires consistent branding or identification.
Choose Glow Photo Paper when:
- You are creating a DIY sign.
- The application is decorative or educational.
- You need a small number of customised signs.
- The sign does not form part of a regulated emergency system.
Choose Glow Stickers when:
- You need individual arrows or symbols.
- Quick installation is important.
- The substrate is suitable for adhesive products.
Surface Preparation & Application

Surface Preparation
The correct preparation depends on the type of Glow Sign being installed.
For adhesive products such as Glow Stickers:
- Clean the surface thoroughly.
- Remove dust and grease.
- Ensure the surface is dry.
- Remove loose or flaking paint.
- Check that the surface is smooth enough for proper adhesion.
- Avoid applying stickers over heavily contaminated or damp surfaces.
For painted signage:
- Clean and prepare the substrate.
- Remove loose coatings.
- Repair damaged areas.
- Apply Glow Primer where required.
- Ensure the surface is suitable for the selected Glow Paint system.
For printed Glow Photo Paper, use a printer and printing method compatible with the paper manufacturer's
Materials Needed
Depending on the project:
- Glow Signs
- Custom Glow Signs
- Glow Stickers
- Glow Photo Paper
- Glow Paint
- Glow Primer
- Printer suitable for Glow Photo Paper
- Cleaning materials
- Measuring tools
- Masking tape
- Application squeegee where appropriate
- UV black light for inspection
- Gloves and suitable PPE where required
Application Steps
Ready-Made or Custom Glow Signs
- Identify the required sign locations.
- Confirm the correct symbol, wording and direction.
- Measure the installation position.
- Clean the substrate.
- Allow the surface to dry.
- Position the sign carefully.
- Apply according to the manufacturer's instructions.
- Check that the sign is firmly attached.
- Inspect its visibility under normal and low-light conditions.
DIY Glow Photo Paper
- Create the artwork or sign on a computer.
- Check the dimensions.
- Confirm that the artwork is suitable for the printer.
- Print onto the Glow Photo Paper.
- Allow the printed surface to dry fully.
- Cut the sign if required.
- Mount it onto a suitable surface.
- Test its appearance after charging.
Professional Tip
During application, periodically switch off the lights and inspect your work using a UV black light. This reveals missed areas, uneven coverage and ensures the best glow performance. The same technique is recommended for UV reactive paints as the black light immediately reveals the finished effect.
For a large installation, create a sample first.
Test:
- Sign visibility.
- Charging conditions.
- Viewing distance.
- Background contrast.
- Adhesion.
- Overall appearance.
This is particularly important when multiple products or substrates are being used.
Safety signage works best when combined with visible route markings and stair-edge identification. For staircases, consider Glow Stair Nosing as part of a broader photoluminescent safety system.
Safety Notes
- Follow the product manufacturer's instructions.
- Wear gloves where appropriate.
- Work in a well-ventilated area when applying Glow Paint.
- Allow coatings to dry and cure fully.
- Keep products away from children during DIY applications.
- Never shine UV lights directly into the eyes.
- Do not use DIY printed signs as regulated emergency signage unless they have been appropriately assessed and approved for that purpose.
Common Mistakes
Using a DIY Sign for a Regulated Emergency Application
Why it happens:
Glow Photo Paper makes it easy to create personalised signs, which can make a DIY sign look suitable for professional use.
How to avoid it:
Use appropriately specified and compliant signage for regulated emergency applications. Reserve DIY Glow Photo Paper signs for suitable non-regulated applications unless the product and finished sign have been properly assessed.
Installing a Sign Without Adequate Charging Light
Why it happens:
The sign may be positioned where it looks correct but receives very little light.
How to avoid it:
Check the normal lighting conditions at the proposed installation location.
Choosing the Wrong Sign Size
Why it happens:
A small sign may look adequate when viewed up close.
How to avoid it:
Consider viewing distance and the applicable requirements before selecting the sign size.
Poor Surface Preparation
Why it happens:
Dust, grease or moisture can be overlooked.
How to avoid it:
Clean and dry the surface thoroughly before installing adhesive signs or applying coatings.
Covering the Sign
Why it happens:
Furniture, decorations, doors or equipment are later positioned in front of the sign.
How to avoid it:
Keep the entire sign visible and unobstructed.
Using Inconsistent Directional Signs
Why it happens:
Different signs or arrows are installed without an overall route plan.
How to avoid it:
Plan the complete route first and use consistent symbols and directions.
Ignoring Maintenance
Why it happens:
Photoluminescent signs do not require electrical power, so they may be overlooked during routine inspections.
How to avoid it:
Periodically inspect signs for dirt, damage, fading, peeling or obstruction.
Assuming Every Glow Sign Is Automatically a Safety Sign
Why it happens:
A product may glow brightly and look like a safety sign.
How to avoid it:
Distinguish between a decorative photoluminescent sign and signage intended for a regulated life-safety application.
Key Takeaways
- Glow in the dark safety signs use photoluminescent materials to remain visible after exposure to light.
- Ready-made Glow Signs provide a convenient solution for common signage requirements.
- Custom Glow Signs can be produced for specific wording, symbols, dimensions and project requirements.
- Glow Photo Paper provides a simple DIY option for suitable non-regulated applications.
- Glow Stickers are useful for individual symbols, arrows and low-level markings.
- Glow Paint can create larger customised photoluminescent markings on suitable surfaces.
- Adequate charging light is essential for good photoluminescent performance.
- Regulated emergency signage should always be selected according to the applicable building and fire-safety requirements.
Complete Safety Systems
Signs are most effective when combined with route markings, stair identification and other visual guidance. See our Glow Safety Tape, Glow Stair Nosing and Emergency Exit Systems Guide for related solutions.
Looking for more glow-in-the-dark ideas,
techniques and applications?
Explore our complete guide.