Glow in the Dark Resin
Learn how to create glow resin using clear resin and Glow Powder, from choosing the right resin and mixing the materials to creating attractive glowing artwork, jewellery, moulded objects and decorative pieces.
Introduction
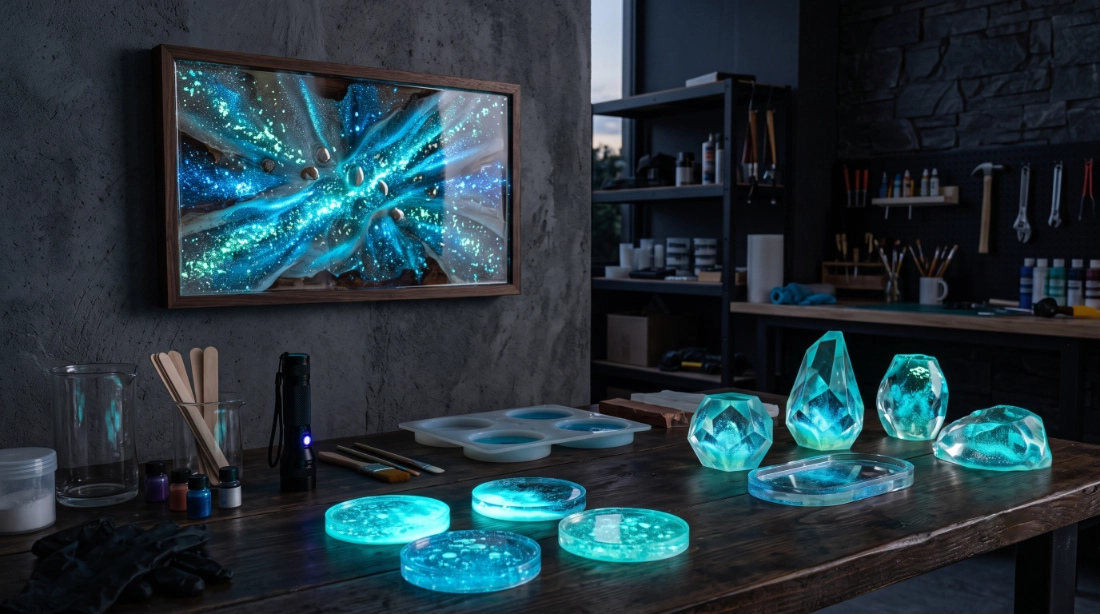
Glow in the dark resin combines the clarity and versatility of resin with the light-storing properties of photoluminescent material.
The basic concept is simple: Glow Powder is dispersed through a suitable clear resin, where the particles absorb light and then release it gradually when the surrounding environment becomes dark.
This makes glow resin particularly useful for creative projects where the glow effect can be suspended within a three-dimensional material rather than simply painted onto a surface.
Applications range from small arts and crafts projects to larger decorative pieces, including:
- Resin jewellery
- Coasters
- Keyrings
- Decorative ornaments
- Moulded objects
- Tabletop artwork
- River-style resin projects
- Art pieces
- Decorative panels
- Custom craft products
The final appearance depends heavily on the resin formulation, Glow Powder concentration, colour of the resin and thickness of the finished piece.
Benefits
Glow resin offers several advantages for creative applications:
- Creates a genuine glow effect without batteries or wiring.
- Can produce interesting three-dimensional effects.
- Allows Glow Powder to be suspended throughout transparent resin.
- Works with many moulded shapes and decorative designs.
- Can combine normal pigments with photoluminescent effects.
- Can be incorporated into jewellery and small craft products.
- Offers different visual effects in daylight and darkness.
For projects where the glow material needs to be applied to an existing surface rather than incorporated into resin, Glow Paint may be more appropriate.
Typical Uses
Arts & Crafts
Glow Powder can be incorporated into resin artwork, ornaments, decorative pieces and craft projects.
Jewellery
Small amounts can be used to create glowing pendants, charms and other decorative pieces, provided the finished resin is properly cured and suitable for the intended use.
Moulded Products
Clear resin moulds allow the glow material to be suspended within different shapes and designs.
Decorative Artwork
Larger resin pieces can incorporate glowing patterns, lines, shapes or contrasting areas of photoluminescent material.
How It Works
- How It Works
- Key Facts
- Advantages
- Professional Tip
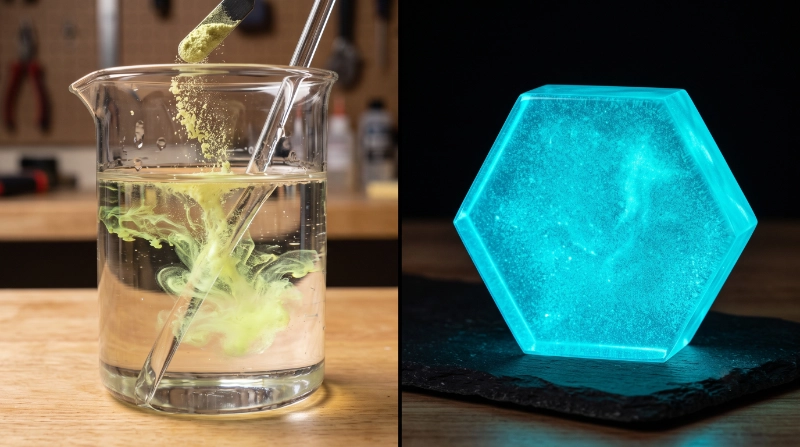
Glow Powder contains photoluminescent material that absorbs energy from light.
When the resin is exposed to sunlight, LED lighting or another suitable light source, the Glow Powder becomes charged.
Once the light source is removed, the stored energy is gradually released as visible light.
The resin acts as the transparent medium that holds the Glow Powder in position.
The resin itself does not create the glow. The Glow Powder provides the photoluminescent effect.
Several factors influence the final result:
- Glow Powder must receive sufficient light to charge.
- A clear or translucent resin allows more light to reach the pigment.
- Higher pigment concentration generally produces a stronger visual effect, subject to the resin's recommended loading.
- Thicker resin pieces can create greater visual depth.
- Dark or heavily coloured resin can reduce the visible glow.
- Good dispersion helps create a more consistent appearance.
The correct Glow Powder-to-resin ratio should always be established according to the resin system and intended application rather than simply adding as much powder as possible.
Glow resin is particularly useful where the designer wants the glow material to become part of the object rather than sitting only on its surface.
Advantages include:
- Three-dimensional glow effects.
- Excellent design flexibility.
- Suitable for moulding.
- Can be combined with decorative inclusions.
- Creates different effects under daylight and darkness.
- Suitable for small and large decorative projects.
Professional Tip
During application, periodically switch off the lights and inspect your work using a UV black light. This reveals missed areas, uneven coverage and ensures the best glow performance. The same technique is recommended for UV reactive paints as the black light immediately reveals the finished effect.
For resin projects, a UV black light is also useful for quickly demonstrating the glow effect while checking whether the Glow Powder has been distributed evenly.
Types of Glow Resin Finishes
Clear Glow Resin
A clear resin containing Glow Powder allows the photoluminescent material to remain visible while preserving the transparent appearance of the resin.
This is one of the most versatile options for decorative moulds and resin artwork.
Glow Resin Inclusions
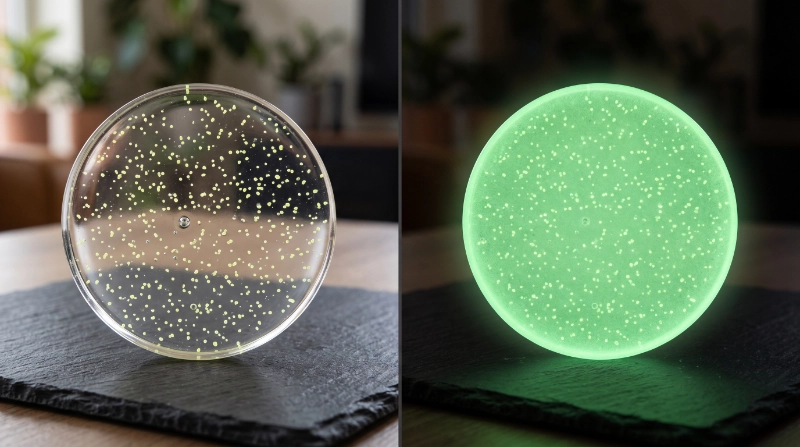
Glow Powder can be concentrated into selected areas of a resin design rather than being distributed throughout the entire piece.
This can create glowing lines, shapes, borders or patterns.
Layered Glow Resin
Multiple resin layers can be used to create depth, with Glow Powder placed selectively between or within layers.
This technique can produce a stronger three-dimensional visual effect.

Glow Jewellery
Small resin moulds can be used to create decorative pendants, charms and other jewellery pieces incorporating Glow Powder.
Clear resin allows the glow material to remain visible while maintaining the shape of the finished item.

Glow Resin Art
Larger decorative resin pieces can combine Glow Powder with conventional pigments, wood, stones or other suitable decorative elements.
This allows the artwork to have one appearance under normal lighting and another after dark.
Day vs Night Appearance
- Day Appearance
- Night Appearance
- Lighting
- Best Results
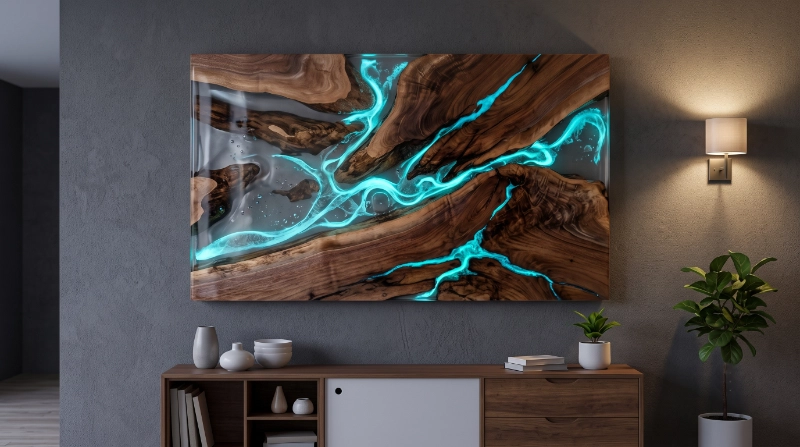
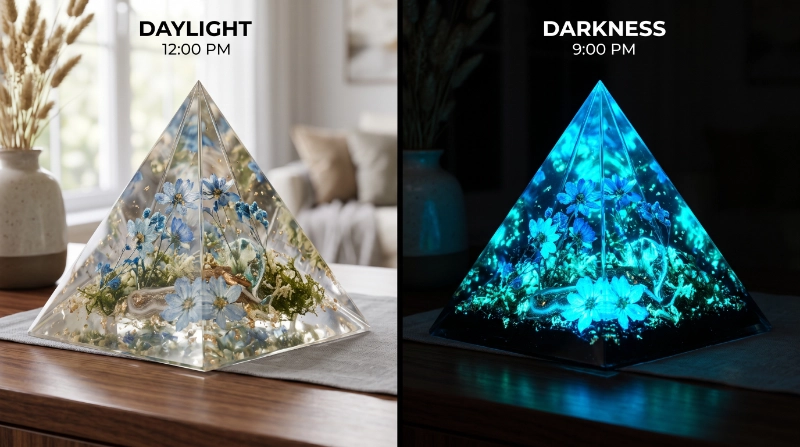
During daylight, clear glow resin can look like a conventional transparent resin piece.
The Glow Powder may appear as fine particles or coloured material suspended within the resin, depending on its concentration and the design.
This allows the piece to function as attractive artwork even when the glow is not visible.
Once the surrounding light is removed, the Glow Powder begins releasing its stored energy.
The result can range from a subtle decorative glow to a much stronger visual effect, depending on the amount of Glow Powder, charging conditions, resin thickness and surrounding darkness.
A completely dark environment makes the glow much easier to see.
Glow resin can be charged using:
- Sunlight
- Bright LED lighting
- Fluorescent lighting
- UV black lights
A UV black light is particularly useful when you want to charge a small resin piece quickly or demonstrate the effect during a craft presentation.
For normal use, however, a dedicated UV light is not essential if the resin receives sufficient daylight or suitable artificial lighting.
For a strong and attractive glow effect:
- Use a clear or translucent resin.
- Select a suitable Glow Powder.
- Distribute the powder evenly where required.
- Avoid unnecessarily dark resin colours.
- Allow the resin to cure according to the resin manufacturer's instructions.
- Give the finished piece sufficient charging time before judging the glow.
- Test a small sample before producing a larger project.
For commercial production, sample testing is particularly important because resin formulations, pigment loading and curing conditions can affect the final appearance.
Brightness Expectations
- Brightness
- Charging
- Glow Duration
- Performance Factors
The brightness of glow resin depends mainly on the amount and quality of Glow Powder, the amount of light absorbed during charging and how effectively light can reach the photoluminescent particles.
A clear resin is generally preferable because it allows charging light to pass through the material.
A resin containing dark or opaque pigments may reduce the amount of light reaching the Glow Powder and therefore reduce the visible glow.
For the strongest result, test the intended resin formulation before producing the finished item.
Glow resin can be charged using:
- Sunlight
- Bright LED lighting
- Fluorescent lighting
- UV black lights
A UV black light can provide rapid charging and is particularly useful for demonstrations, photography and testing.
For everyday decorative use, normal room lighting or daylight may be sufficient, although the resulting glow will depend on the intensity and duration of exposure.
A good Glow Powder can remain visibly luminous for several hours after sufficient charging.
The glow is normally strongest immediately after the charging light is removed and gradually becomes less intense.
Actual performance varies according to:
- Glow Powder quality
- Pigment concentration
- Charging time
- Charging light intensity
- Resin transparency
- Thickness of the resin
- Ambient darkness
Avoid promising a specific glow duration unless it has been tested under defined conditions.
| Factor | Effect on Glow |
|---|
| Clear resin | Allows more charging light through |
| High-quality Glow Powder | Stronger photoluminescent effect |
| Adequate pigment loading | Improves visible glow |
| Bright charging light | Faster and stronger charging |
| Dark environment | Makes glow easier to see |
| Dark or opaque resin | Can reduce glow |
| Uneven dispersion | Can create inconsistent brightness |
Choosing the Materials
The most important components are a suitable clear resin and a compatible glow pigment. See our Epoxy Resin and Glow Powder pages for more information on the materials commonly used for glow resin projects.
Choosing Products
| Product | Best For | Location | Difficulty | Notes |
|---|---|---|---|---|
| Glow Powder | Mixing into clear resin | Indoor/Outdoor | Moderate | Provides the photoluminescent effect. |
| Clear Medium Resin | Holding Glow Powder in a finished piece | Depends on resin system | Moderate | Choose a resin suitable for the intended project. |
| UV Lights | Rapid charging and testing | Indoor/Outdoor | Moderate | Useful for checking the glow and charging samples quickly. |
| Glow Paint | Painting glow effects onto cured surfaces | depending on product | Moderate | Better suited to surface decoration than mixing into resin. |
Recommended Products
For a typical glow resin project, the essential combination is:
- Glow Powder
- Clear Medium Resin
- UV Light for testing and rapid charging
Before adding glow pigment, choose a suitable clear Epoxy Resin that allows the finished photoluminescent effect to remain visible.
The resin should be selected according to the intended application. For example, jewellery, casting, artwork and larger decorative pieces may require different resin characteristics.
Glow Powder vs Glow Paint
Glow Powder is the appropriate choice when the glow needs to become part of the resin itself.
Glow Paint is better when you want to apply a glow coating to an existing cured surface.
Glow Powder and Glow Pigment are the same product.
Surface Preparation & Application
Glow Resin Applications
Glow resin can be used for decorative surfaces, artwork, furniture and other creative applications. See our Glow in the Dark Epoxy Guide for a more detailed look at epoxy floors and surfaces.

Surface Preparation
For resin casting, surface preparation mainly concerns the mould, work area and materials rather than a wall or concrete surface.
Ensure:
- The mould is clean and dry.
- The work surface is level.
- Mixing containers are clean.
- The resin and Glow Powder are free from contamination.
- The surrounding area is suitable for resin work.
If applying a Glow Powder resin coating onto another material, that substrate should also be clean, dry and suitable for the selected resin.
Materials Needed
A typical project may require:
- Glow Powder
- Clear Medium Resin
- Appropriate resin hardener or curing component
- Mixing cups
- Mixing sticks
- Accurate measuring equipment
- Suitable mould
- Protective gloves
- UV black light
- Suitable ventilation
Always follow the specific resin manufacturer's instructions for mixing ratios, working time, curing and handling.
The glow effect in resin is created by incorporating a suitable glow powder into the resin mixture. See our Glow Powder page for more information on choosing the right photoluminescent powder for resin projects.
Application Steps
- Prepare the mould and work area.
- Measure the resin components accurately according to the manufacturer's instructions.
- Mix the resin and hardener thoroughly.
- Add the required amount of Glow Powder.
- Mix carefully until the powder is evenly distributed.
- Pour the mixture into the mould.
- Remove bubbles using the resin manufacturer's recommended method.
- Allow the resin to cure fully.
- Remove the finished piece from the mould.
- Charge it with light and inspect the glow.
For larger commercial projects, produce a small test sample before committing to a full production run.
Professional Tips
Professional Tip
During application, periodically switch off the lights and inspect your work using a UV black light. This reveals missed areas, uneven coverage and ensures the best glow performance. The same technique is recommended for UV reactive paints as the black light immediately reveals the finished effect.
Additional tips:
- Measure resin components accurately.
- Avoid adding excessive Glow Powder without testing the formulation.
- Mix thoroughly but avoid unnecessarily introducing air.
- Test the colour and glow before producing a large batch.
- Keep records of successful resin-to-powder formulations for repeat production.
Safety Notes
Resin systems can contain chemicals that require careful handling.
- Follow the resin manufacturer's safety instructions.
- Wear appropriate gloves and protective equipment.
- Work in a well-ventilated area.
- Avoid skin and eye contact.
- Do not use uncured resin for finished consumer items.
- Keep resin components away from children and pets.
- Allow the resin to cure fully before handling or use.
Common Mistakes
Using Too Much Glow Powder
Why it happens
More powder may seem like an easy way to increase brightness.
How to avoid it
Test different loading levels first. Excessive powder can affect the resin's appearance, flow and final finish.
Using an Opaque Resin
Why it happens
A coloured resin may look attractive during the day but prevent sufficient light from reaching the Glow Powder.
How to avoid it
Use clear or translucent resin when maximum glow performance is important.
Poor Mixing
Why it happens
Glow Powder settles or becomes unevenly distributed.
How to avoid it
Mix thoroughly and consistently, following the resin manufacturer's working-time recommendations.
Incorrect Resin Mixing Ratio
Why it happens
Adding too much or too little of one resin component.
How to avoid it
Measure the resin components accurately and follow the manufacturer's specified mixing ratio.
Judging the Glow Without Charging the Piece
Why it happens
The finished resin is tested immediately after curing.
How to avoid it
Expose the piece to a suitable light source before evaluating its glow.
Using the Wrong Resin for the Application
Why it happens
Different resin systems have different properties.
How to avoid it
Choose a resin appropriate for casting, coating, jewellery, artwork or the intended end use.
Skipping a Test Sample
Why it happens
The project appears simple enough to produce directly.
How to avoid it
Make a small test batch first. Check colour, transparency, curing, surface finish and glow performance before scaling up.
Key Takeaways
- Glow in the dark resin is created by combining clear resin with Glow Powder.
- Glow Powder provides the photoluminescent effect; the resin acts as the transparent medium.
- Clear or translucent resin generally provides better access to charging light. Excessive pigment loading can affect the resin's appearance and handling.
- Always follow the resin manufacturer's mixing and curing instructions.
- Test a small sample before producing a large commercial project.
- A UV black light is useful for rapid charging and checking the finished glow. Fully cured resin should be used for the intended application according to the resin manufacturer's specifications.
Looking for more glow-in-the-dark ideas,
techniques and applications?
Explore our complete guide.